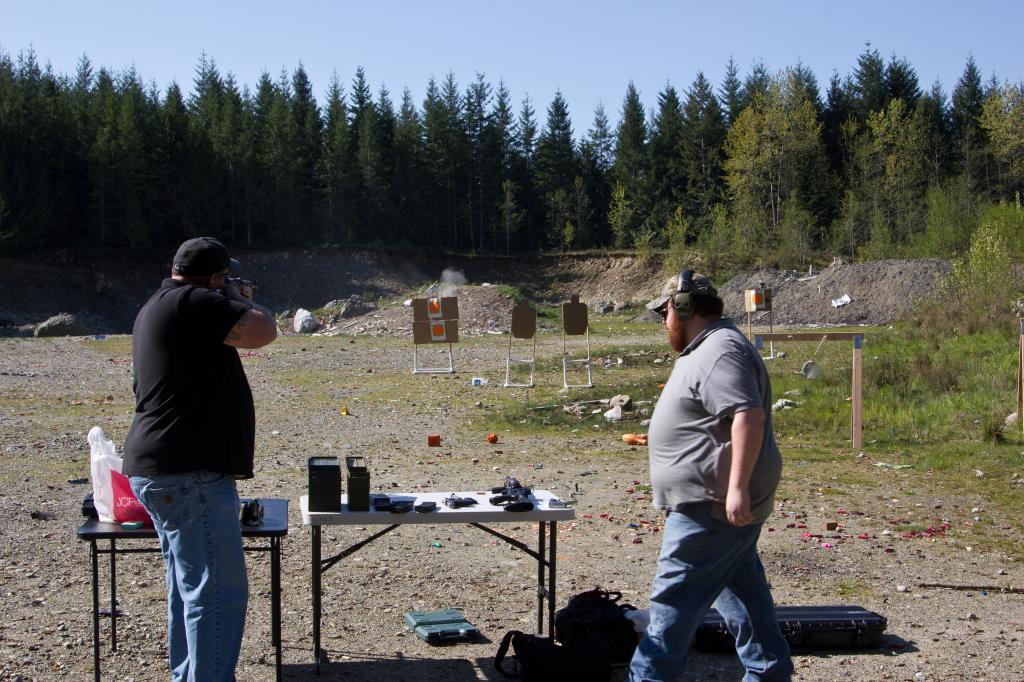
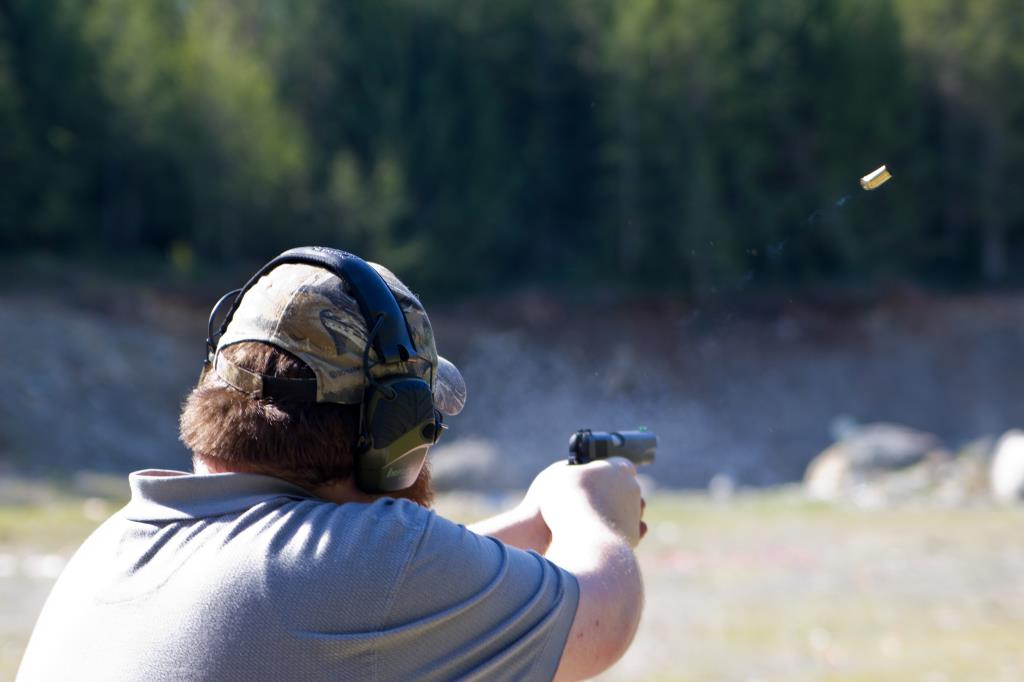
A while back, Ken heard about a nice/safe/legal place to shoot out on some federal land. He was nice enough to take Logan and I there and reveal its secret location. We got there around 10am on a Saturday and there was another group setting up. Thankfully, they were friendly and very safety conscious. We had a safety meeting with them before any shots were fired and agreed on some protocols to make sure the day stayed fun for everyone. Aside from making the shooting area a little more cramped, they didn’t bother us at all.
Logan and Ken provided all of the guns and ammo. I can’t even tell you the names of everything they had, but I had fun shooting them. I brought along my shotgun but with the other group there, we decided not to throw any clays.
I snapped a few photos with my camera and also brought my quadcopter along. I figure if we’re going to participate in an activity that needlessly frightens big portions of the population, I might as well throw a DRONE into the mix too. The quadcopter was a little unbalanced producing some jello-y footage. I forgot to set it on 720p60 instead of 1080p30 which would have produced a little smoother video. But it’s still fun to see the site from the air and I popped it up a couple hundred feet high to take a peek around.
Thanks Ken for showing us your secret spot and thanks to both Ken and Logan for letting me play with all their toys!
Poaching is a $19 billion industry in Africa. It’s a big problem with a huge ecological impact, but it’s a very difficult one to solve. There’s too much ground to cover to do it with actual humans, but there is now a team in Africa doing this with drones. Obviously it’s good because it’s helping to save animals, but the tech angle is awesome.
First, they use big data processing back in Maryland to predict where the poachers will be. Then they send out UAVs with ~2 hour flight times to monitor the area. If poachers are detected, an enforcement team is sent out to stop them before they kill any animals. A ground team is there to rotate batteries and they have a 3D printer so they can fabricate just about anything they need to keep the planes aloft. The system works. In the last six months, they have completely shut down poaching in one of the parks where they were previously seeing 12-19 deaths/month.
The operation costs $500K/year for just a single team. It’s not cheap, but it’s important. They’ve set up an IndieGogo campaign to fund their work.
There are so many negative stories in the press about “drones”. It’s nice to see a good story come through.
There’s so much negative press around the radio controlled hobby right now. Any time I see a headline with the word “drone” in it or I hear someone on the radio start talking about “drones”, I feel compelled to look away or change the station. It’s almost certainly going to frustrate me. Sometimes neighbors walk up when I’m flying my multicopter and say “Is that a drone?” The snarky reply I want to give is “Only if you watch too much TV”, but instead I try to give them a little education about what it can and can’t do.
It’s not their fault for being uneducated about a hobby that is going through a massive period of change. The electronics needed to succeed in remote control flight are orders of magnitude better than they were 10 or even 5 years ago. This technological growth is allowing whole new groups of people to enter the hobby, and while the vast majority of us are responsible, there are always a few people who feed the media frenzy around “drones.”
Why the big change now? Ten years ago, if you wanted to fly anything remote controlled, you needed to like learning/building as part of the hobby. You probably needed a friend to help you decipher it all and you probably flew at a club site where lots of other people could teach you how to fly safely. With all the new technology, you can walk into a hobby store, plop down your credit card, and walk out with something that would have been science fiction a decade ago. You don’t need to know anything about actual flight. Just push the stick and the computers will translate that into some sort of “safe” flight using lots of sensor to back you up. What might have taken you a month of learning and training with other people helping you can now be accomplished in hours on your own.
It’s that “on your own part” that is causing all the trouble. You didn’t build it yourself to learn how it works and what is dangerous about the device, and you didn’t have someone there how to be safe. It might all be ok, but you learn how to fly completely reliant on all the onboard computers and sensors. You might not even know that there’s a GPS receiver on there that is keeping your multicopter from flying away. What happens when that GPS receiver loses it’s signal? What happens when the accelerometer board has a glitch? Can you fly it manually and safely get it back home or are you going to crash into the White House lawn or a crowd of kids in a park? This is how news stories get made.
It’s easy to cross the line here and sound like an old curmudgeon that doesn’t want new people in his hobby. It’s awesome that so many people are getting excited about this hobby, but it’s not awesome that they are taking a “shortcut” and skipping a lot of the background needed to do it safely.
The FAA is scrambling to try and enact some regulations around this. So far, most of those have been overreaching and ridiculous. We already have laws to cover things that people are concerned about with “drones.” We don’t need extra ones. But what might make sense is requiring a license before you can fly either privately or commercially. Make people take some basic training/online test that teaches about the safety rules and guidelines both to protect other people and to protect the pilot.
Eventually we’ll get to a point where the onboard sensors and computers are SO good that you really can fly these without much training or knowledge. It’s just this interim period that is dangerous for the future of the hobby. Overreactions at this point can put a real damper on the progression needed to get to that safe point.
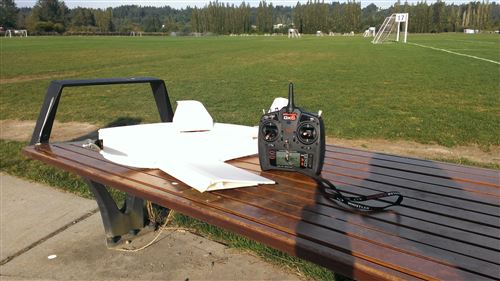
For my birthday, Tyla bought me a Bixler 2 which was a nice step up from the foam board airplanes I had been building before. I’ve had a ton of fun with that and only one bad crash (but it was flight ready again in less than 15 minutes.)
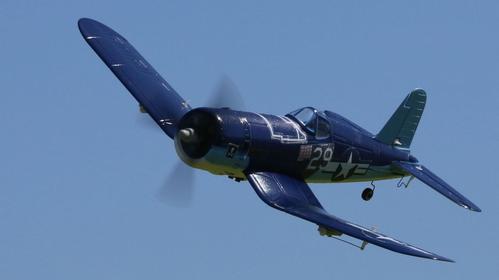
For Christmas, she bought me another step up in difficulty: the UMX F4U Corsair BNF with AS3X from E-flit. That’s a mouthful, but as you might have guessed, it’s an F4. And it’s TINY. The wingspan is less than 16″! The “AS3X” part of the name is a little on-board computer that helps keep the tiny plane from feeling too touchy. The net effect is that it flies like a much bigger plane as the computer seamlessly counteracts the effects of wind.
This plane is small but it’s still a bit too fast to fly in our cul-de-sac. It’s a great one for a soccer field though and the schools down the street provide lots of flying opportunities for it.
The tiny plane doesn’t skimp on the details. I took my own pictures but these photos from the marketing site are much better. Want to fly it sometime? I’d be happy to buddy box with you!
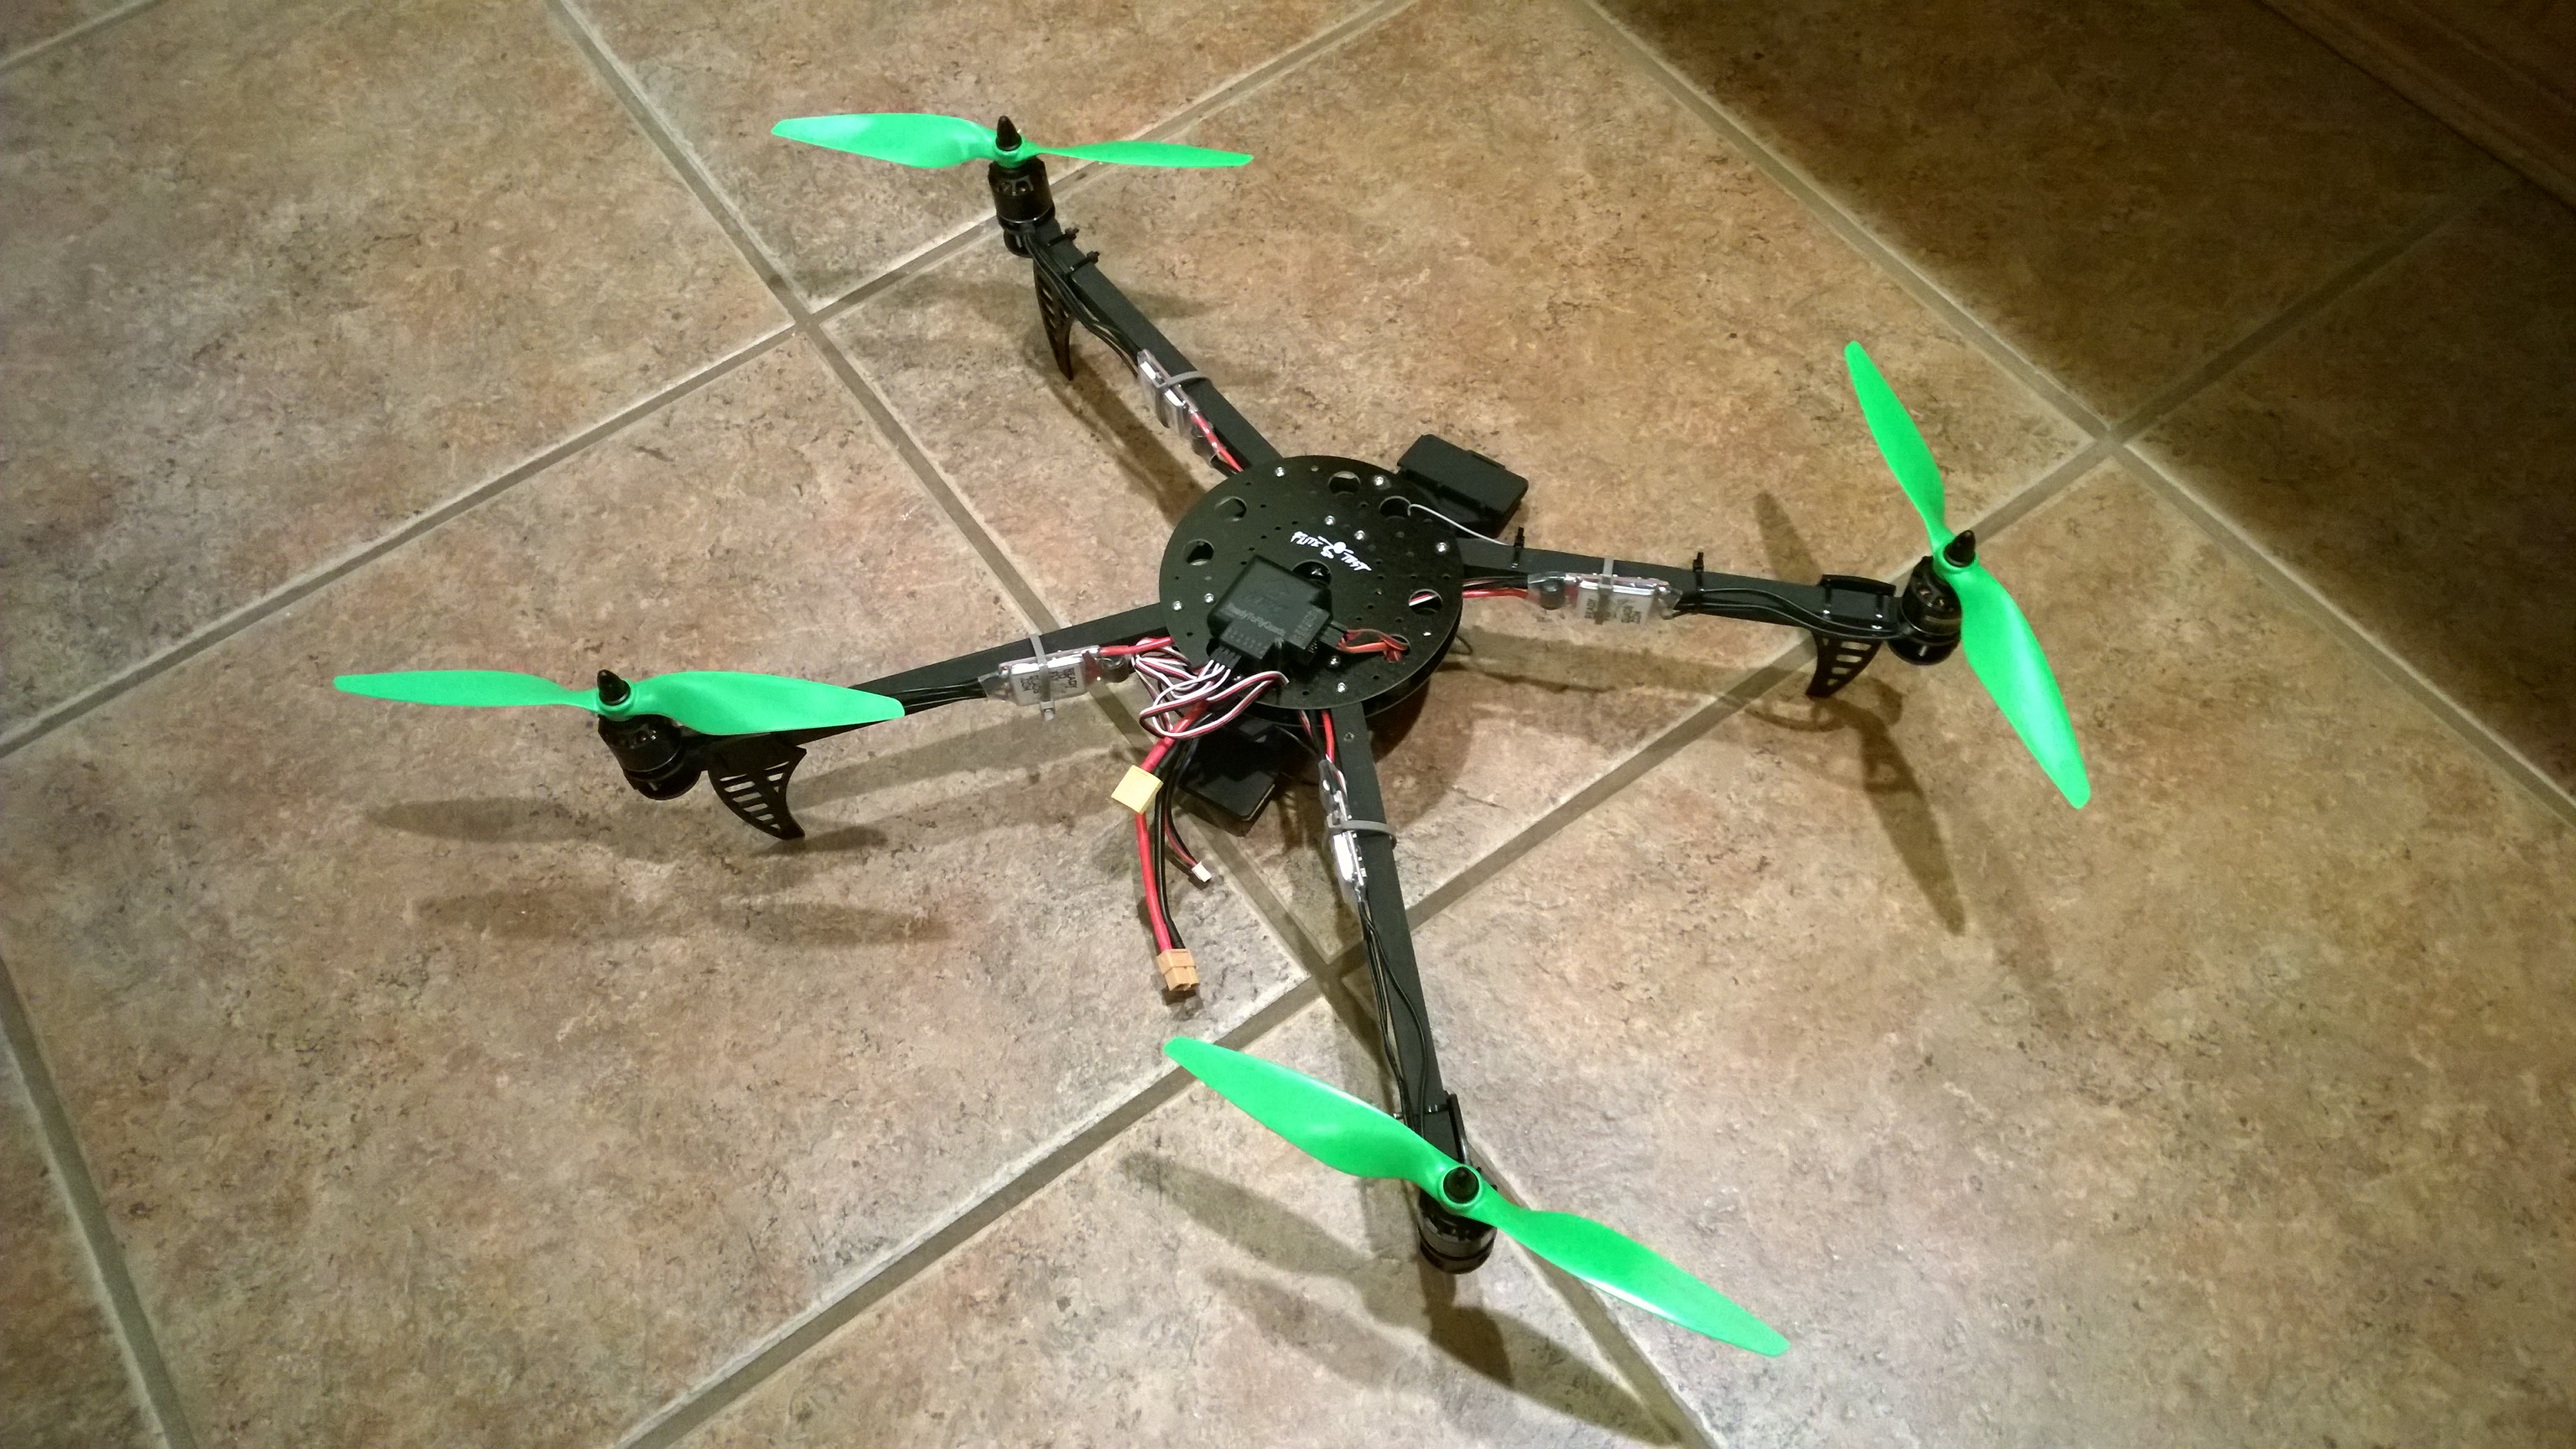
My new Flite Test spider quad was all put together and the first flight was a success. So what do you do on the second and third flights? Strap a GoPro to it! I specifically built it in this style with the front arms spread wide so that the video image wouldn’t have any obstructions. Might as well see how it works.
It works fantastically! There is no fancy camera stabilization system on this. The camera hangs from some bent wire that absorbs some vibrations. That, combined with time spent balancing each propeller, produces some pretty clean video. It’s significantly better than I expected and will be more than fine for the type of projects I have in mind for it.
What you see below is from the second time out. It turns out that my house DOES have a view of Rainier. You just need to get a few hundred feet up in the air to see it. Enjoy!
P.S. So why am I calling this a “quadcopter” or “multicopter” instead of a “drone”? I’m not a big fan of the word drone because it feels like the media has given it a negative connotation. Plus, I believe that a drone is something that is capable of autonomous flight. Granted, this quad that I’ve built could be autonomous with about $50 worth of electronics but it’s not a drone yet.
A little over a year ago, I started off in the RC hobby with the intent on flying a quadcopter carrying a camera. I quickly learned that this is a difficult place to start so I fired up a flight simulator, built some extremely cheap foam board airplanes and then flew some nicer airplanes (Bixler 2 and UMX F4 Corsair.) I also picked up a Nano QX quadcopter to fly around the house and learn a bit about flying quads. I’m not a pro by any means, but I learned a LOT about RC flight and about the electronics that are part of the hobby.
I decided to take the plunge and get a real quad. There are lots of options out there. The most popular ones you see in the stores and in the news are things like the DJI Phantom, but they are pricey. For example, the Phantoms start around $500 and go over $1000. And you know what happens when you crash? You shell out more money for the custom replacement parts. No thanks.
Instead, I bought a kit from Flite Test for their ElectroHub and also bought the accompanying electronics kit from Ready To Fly Quads. The whole thing, including tax, was under $230 and that includes some spare parts that I know I will break (props, landing gear, etc.) Building it from scratch takes a bit more work, but now I understand every piece of the puzzle and when something breaks, I can fix it with off the shelf parts that are cheap and easily available. FliteTest has a full build video showing all the steps.
The FliteTest guys say it takes them a couple hours to put one together. It probably took me 5-6 because I was learning a lot and going very slowly and I also spread that out over a few days. Basically the steps are to assemble the arms, solder the wires for the speed controller to the motors, solder the speed controllers to the power distribution board, wire up the computer board and the receiver, triple check everything and then give it a shot.
My first flight attempt was out on the back patio near dusk. I just wanted to lift off the ground and then land it to prove that everything was connected correctly. Unfortunately, it didn’t even get a foot off the ground before it flipped over and crashed. D’oh! Thankfully nothing was damaged but I did lose the spinner that holds the prop on.
That ended up being the key to diagnosing the crash (with the help of some friendly community members on the FliteTest forums.) The best guess is that the prop fell off when I took off because it wasn’t on tight enough and that, of course, caused the computer to freak out and flip over. I pulled a 5mm nut off my workbench, reattached the prop and I was ready to fly again!
By this time it was dark so I pulled the cars out of the garage and tried again. It worked! I hovered for about five minutes and landed safely multiple times in that period. A video of that is included at the end of the post.
Next steps are to wire up some LED lights (to help with orientation and to look cool), get the nerve to load a GoPro onto the camera tray, and also see if the board has any other cool features like auto hover, altitude hold, etc. The board is a modified Arduino and the sketch files are provided so you could theoretically do whatever you want. I’ll leave that to the pros though and just buy the finished product.
This was a huge victory for me though. Now I need to work on my piloting skills and be able to fly this safely. One big advantage of the quad is that I can work on this in the back yard, the cul-de-sac, or even in the garage! I don’t have to drive anywhere to learn more of the basic skills.
By the way, you might have noticed that this isn’t a perfect X configuration. That’s why this is called a “spider” configuration (or a “dead cat.”) The front arms get spread out a bit farther so that you can get a good field of view from your camera on the front.
It’s awesome that you can learn a seemingly complicated hobby like this using only YouTube and forums. Thank you to all the friendly people at FliteTest!
My entry into the RC flying hobby has been quite slow. It started a year ago, but I took most of the summer off while I worked on the yard and other projects. And even when I’m not working on projects, I don’t have much time to actually get out and fly.
I started by building my own planes out of foam board with lots of help from the guys at FliteTest.com. That was a low-cost entry into the hobby. When I crashed (and I crashed A LOT), fixing the plane meant a short trip to the dollar store. But in the evenings I was always looking around to figure out what my first “real” plane would be.
I ended up setting my sights on the Bixler 2 (named after one of the hosts at FliteTest), and I was thrilled when Tyla got it for me for my birthday! I took quite a while to get it put together and along the way, I made some modifications to account for common problems that people have with the plane. The biggest one is adjusting the way that the wings are held together. I added some 3M hooks and a rubber band through the fuselage. That doesn’t look quite as pretty but it’s a lot easier to use and doesn’t affect the flight characteristics.
The other change was adding flaps to it. The plane comes with flaps but does not include the electronics for it. Wiring it up was easy, but because of the way they have the cutouts for the servos, it took a lot of fancy transmitter programming to get them to function right. (Basically you need to set up a mix between your Gear switch and your AUX1 switch so that they both operate together but opposite which moves both flaps down.)
Blah blah blah how does it FLY!? Honestly, part of the reason I took so long to fly it is because I was afraid of crashing it. Pretty much every plane I’ve built up to this point has had a first flight of about 5 seconds. It inevitably crashes into the ground in a spectacular manner. Thankfully, this one flew amazingly. Takeoff is a little bit tough as you have to hand launch, and, because of the way the pusher prop is mounted, the plane wants to dive a little under full power. But I succeeded on my first attempt and after about 30 seconds, the butt clenching disappeared and I was just having FUN.
Thinking back over the best flights I’ve had with my hand built planes over the last year, this one trumped them all. It was all trimmed out perfectly and I could take my hands off the transmitter and not lose control. Here are some of my favorite parts of that first flight:
It glides like a dream. In fact, I had a lot of fun just climbing up to altitude and then shutting off the power.
I put a 2200mah 3 cell in it and after 16 minutes of throttle time (plus more time gliding around), I still had 37% battery left. My little foam planes were lucky to get 7 minutes per flight. I think I’ll be able to comfortable set the timer at 20 minutes for this plane.
The flaps were a great addition. There’s no landing gear on it. A belly landing without flaps would be possible, but the flaps slow it down to a crawl and it only slides for 3-4 feet before stopping. Engaging the flaps gives quite an abrupt elevation increase though so I might end up mixing in some down elevator with the flaps in my transmitter.
It’s a little hard to explain but it was the closest thing I’ve felt to flying in the RC flight simulator program. In that program, everything is so smooth and controllable. My previous foam board planes were often a handful and I never got that relaxed feeling with them.
I feel so comfortable flying this plane that I’m already thinking about putting a GoPro on it. This is a very popular plane for aerial footage and people do a lot of FPV (First Person View) flying through video goggles with it too. I don’t have gear for that but it might be an option down the road.
In case you couldn’t tell, I’m really happy with this plane. It’s definitely still in the trainer category, but it’s the fanciest and best thing I’ve flown yet. While the little foam board planes were frustrating at times, I think it’s good that I started with them instead of this “real” plane. My first flight with it would certainly not have gone as well.
After about a year of flying cheapo RC planes made out of foam board from the dollar store, I feel like I’m ready to attempt my first “real” RC plane. A huge thanks goes to Tyla for buying me the Bixler 2 that I’ve had my eye on. It’s still a beginner plane, but it’s much more capable than what I’ve been flying. Plus, there is a big community built up around this plane of people who make modifications for flying FPV (First Person View) and other things like that. I’m looking forward to putting it together and tossing it in the air. Any bets about how long it will fly before it’s first crash?
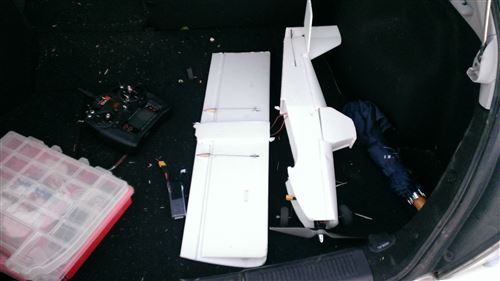
After many attempts, I finally gave up on my FT Duster. I finally figured out that a crash somewhere along the way had caused the tail to be out of whack. I used the heat gun to melt the glue and remove the old tail, fabricated a new one and then installed it. Everything was square and it actually flew pretty well. But then, mid-flight, the power pod broke loose and the plane spiraled hard into the ground. The fuselage was pretty bent up and correcting it basically would mean rebuilding a plane. It’s only a few dollars work of foam board but I’ll save that for another day. I was getting too frustrated with it to continue.
Instead, I pulled out the plans for an FT Nutball which is MUCH simpler to construct and fly. I had it together in an hour or two and the first time I powered it up, it flew great! I ran into another problem though. Elijah was afraid of it. He’s never been afraid of the planes before but for some reason, he just wasn’t happy whenever it was in the air.
I landed before using up all my batteries, but as I was cleaning up, I noticed three hot air balloons making their way towards the park! They make regular morning and evening flights down the valley and we can see them from our house. But this was the first time I’d been at their landing spot. We stayed around for about an hour watching them land and pack the balloons away. Elijah enjoyed watching them, but he was more impressed by the park’s John Deere Gator that was driving around in the parking lot. That boy loves trucks!
Sometime back in February or March, I picked up a new RC airplane kit. Just like my previous planes, this one was from the guys at FliteTest. It was a kit for the FT Duster and instead of getting the regular electronics package, I decided to step it up and get something more powerful. I went with “The Beef” package from Lazertoyz.com. I still haven’t seen the move Planes yet, but this RC plane is designed to look like the lead character in that movie.
Even though I’ve had it for so long, I just finished building it last week. I was spending so much time on house projects (including the back yard) that I just didn’t have the energy to spend on a hobby.
The build itself went pretty smoothly, but still included a few screwups. It wouldn’t be a project of mine if I didn’t mess something up. It’s just foam, hot glue and tape though so everything is fixable. I was so excited to get out and actually fly it that one night after putting Elijah to bed, I hurried down to the park before dark to see if it would fly.
The plane has optional landing gear but I decided to put some on. Actually I didn’t build new landing gear. I just borrowed it from one of my previous planes. When I tried to take off, the angles weren’t right and the landing gear folded underneath so I hand-launched it instead. My plan had been to just take a short hop and then land, but hand launching requires more throttle so I just took off into the air. I immediately knew I had a problem: the plane was a bit too nose heavy and I didn’t have enough elevator control to overcome it. Extra throttle gave me enough lift to stay in the air, but that’s not a great solution. I wanted to get it back on the ground as quickly as possible to try and fix it before things got worse… Cutting the throttle meant that the nose came down and I couldn’t hold it up with the elevator so I landed pretty hard. The landing gear (which I didn’t really need in the first place) and the extra speed combined to rip the entire wing off the fuselage. Ugh. 6 months of waiting and then I had a destroyed plane in 34 seconds.
As I was driving home, I realized that I put myself into this pickle with my fancy new transmitter. I had adjusted the travel on all the control surfaces to be relatively tame, but that backfired by not giving me enough control to overcome the nose heaviness. If I had been quicker in my thinking, I could have switched to the “high rates” mode and gotten a little more travel on the elevator.
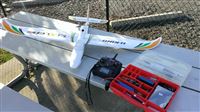
Thankfully some hot glue and tape fixed the plane back up and you can’t really tell it was in such a major accident. I swung by the park for a quick flight on the way to work the next day. I double-checked all my settings, adjusted my transmitter to give me more throws on the elevator and then hand launched without the landing gear. It flew beautifully! I had no idea how long the battery would last on this plane so I came back in after 7.5 minutes, landing slowly enough to not do any damage. I then took this “Hurray! Success!” photo.
But of course the story doesn’t end there. I got my battery tester out and realized I still had a little over half a battery left! Time to throw it back in the air. As soon as I took off the second time, I noticed that the plane was MUCH more touchy. I figured out that I had accidentally bumped the “high rates” switch on the controller and generally that’s good to leave off for takeoff and landing. Well I tried to get it all corrected but it all happened so fast that I nose dived in from about 10-20 feet up. That broke the prop and the motor mount, but again, those are fixable/replaceable.
This is roughly the course that each of my scratch builds have taken. It’s nice to only have a few dollar worth of foam in the air though! I would be a lot more disappointed if I had just crushed a fancy balsa model.


 Poaching is a $19 billion industry in Africa. It’s a big problem with a huge ecological impact, but it’s a very difficult one to solve. There’s too much ground to cover to do it with actual humans, but there is now a team in Africa doing this with drones. Obviously it’s good because it’s helping to save animals, but the tech angle is awesome.
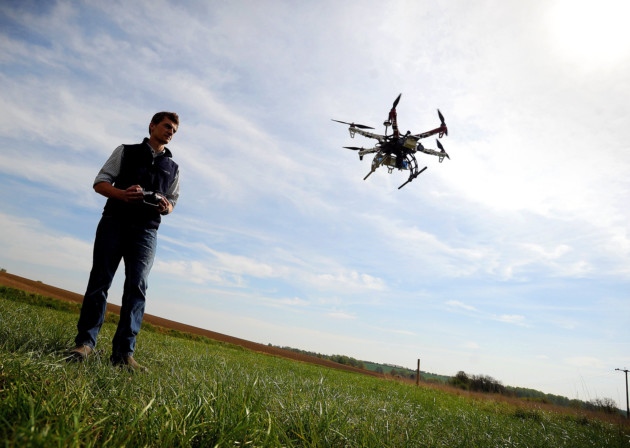
 My new Flite Test
 My entry into the RC flying hobby has been quite slow. It started a year ago, but I took most of the summer off while I worked on the yard and other projects. And even when I’m not working on projects, I don’t have much time to actually get out and fly.
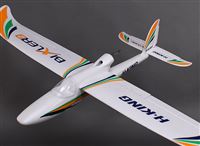 After about a year of flying cheapo RC planes made out of foam board from the dollar store, I feel like I’m ready to attempt my first “real” RC plane. A huge thanks goes to Tyla for buying me the
  After many attempts, I finally gave up on my FT Duster. I finally figured out that a crash somewhere along the way had caused the tail to be out of whack. I used the heat gun to melt the glue and remove the old tail, fabricated a new one and then installed it. Everything was square and it actually flew pretty well. But then, mid-flight, the power pod broke loose and the plane spiraled hard into the ground. The fuselage was pretty bent up and correcting it basically would mean rebuilding a plane. It’s only a few dollars work of foam board but I’ll save that for another day. I was getting too frustrated with it to continue.
 Sometime back in February or March, I picked up a new RC airplane kit. Just like my previous planes, this one was from the guys at