A while back I stumbled across a coupon for 100 free 4″x4″ prints. I’ve had a project in the back of my mind that involved something about displaying a bunch of Instagram photos. This seemed like a good match so I ordered them. (By the way, I later discovered that if you use the Shutterfly app on your phone, you get unlimited free prints so this wasn’t much of a coupon.)
The 100 photos arrived and sat around for a while as I thought about how to do this. My initial thought was to get a ton of practice making frames and pump out 100 identical simple frames. That sounds painful, but what stopped me was realizing that I had no good way to attach them all to the wall without making at least 100 holes in the wall. Then I thought about making a single frame that could hold 100 photos. I’ll take you along the project in more detail that I have in the past. If you follow my woodworking Instagram account, some of these pictures will look familiar.
The first step was to figure out how big to make this and what aspect ratio it should have. I started laying them out on my table and quickly realized that a 10×10 grid of 4″x4″ prints was going to monstrous. I settled on a 6×6 grid.
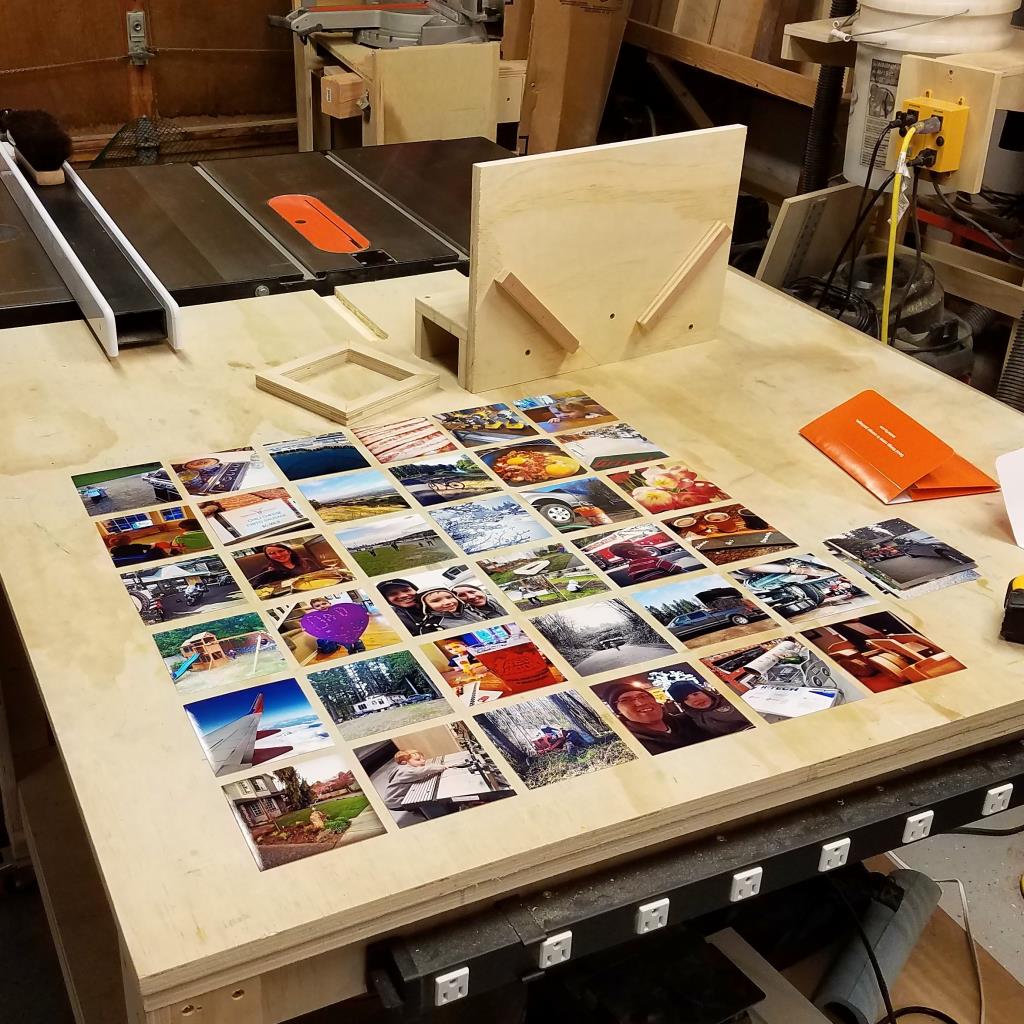
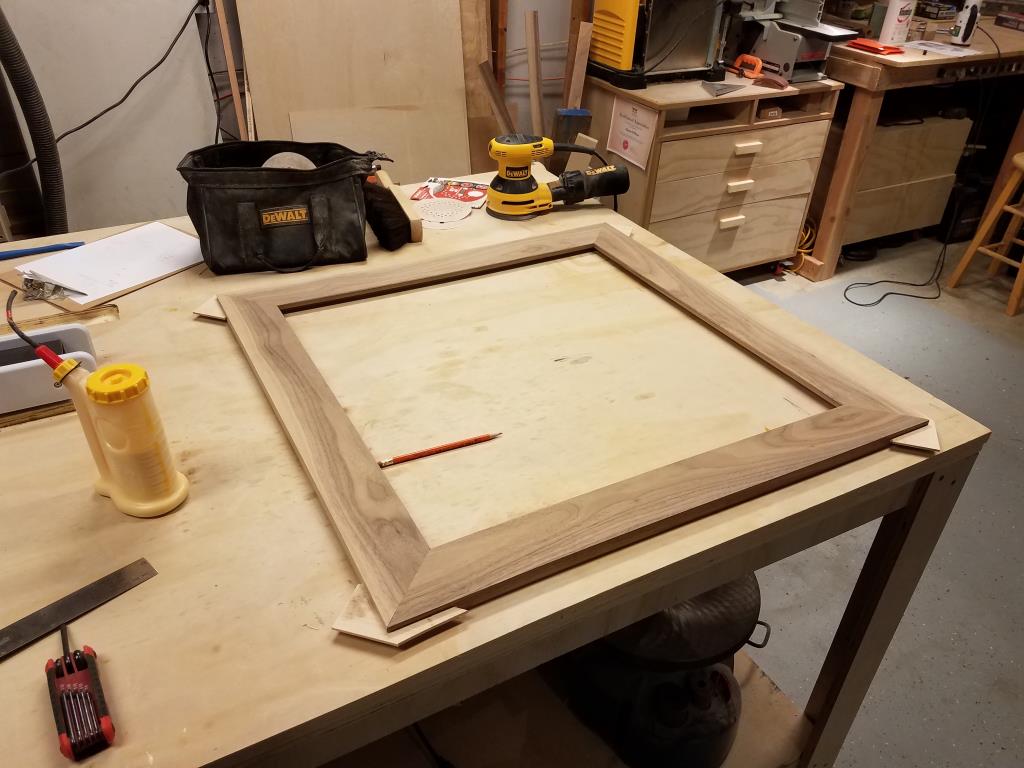
Also sitting on the table in that picture, you can see a jig for making photo splines. I made that jig as well as a miter jig. Both came from David Picciuto over at makesomething.tv.
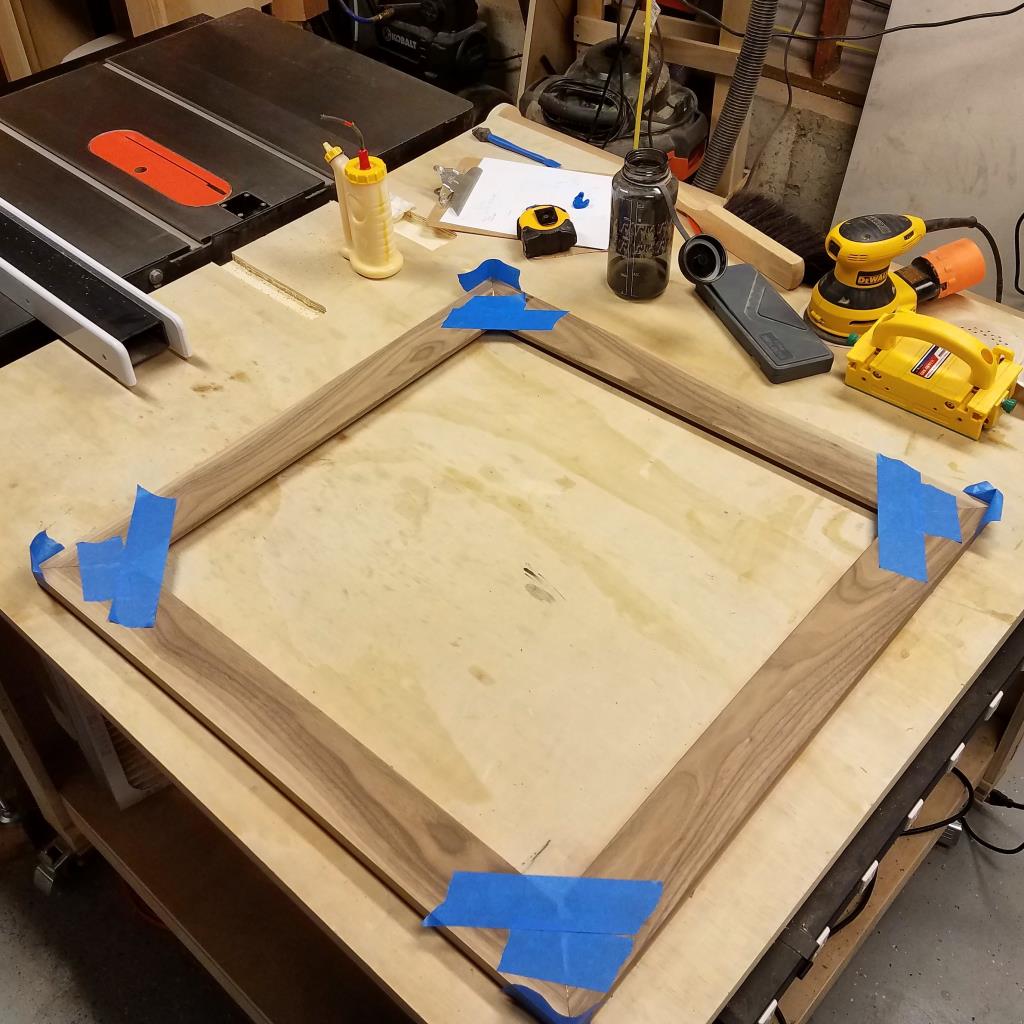
I figured out the spacing between the pictures and the resulting dimension of the frame and started milling up the walnut to make the outer frame. I cut a rabbet in the back to hold the glass and the plywood backer and then did a very slight chamfer on the inside of the frame. Then it was time to cut up the walnut into the individual frame pieces.
I thought I had nailed the miter jig, but with a frame this big and wide, even the tiniest error was amplified. My frame wasn’t even close to fitting.

I almost threw in the towel at this point, but ehh, it was already kind of ruined so why not try to fix it? I basically free handed the miters and nibbled away with tiny increments to all the corners until somehow it all came together! If you look closely, you can tell that I’m still off by the tiniest of margins, but hey, it’s not bad considering how I got there. I used blue painters tape for clamps and glued the pieces together.
The next step was to try out my spline jig. It looked pretty wild, but in reality, I felt like the whole setup was pretty safe. Everything was clamped on place and all I had to do was move the sled through the blade. But if I was going to do frames this big on a regular basis, I might make a bigger jig.
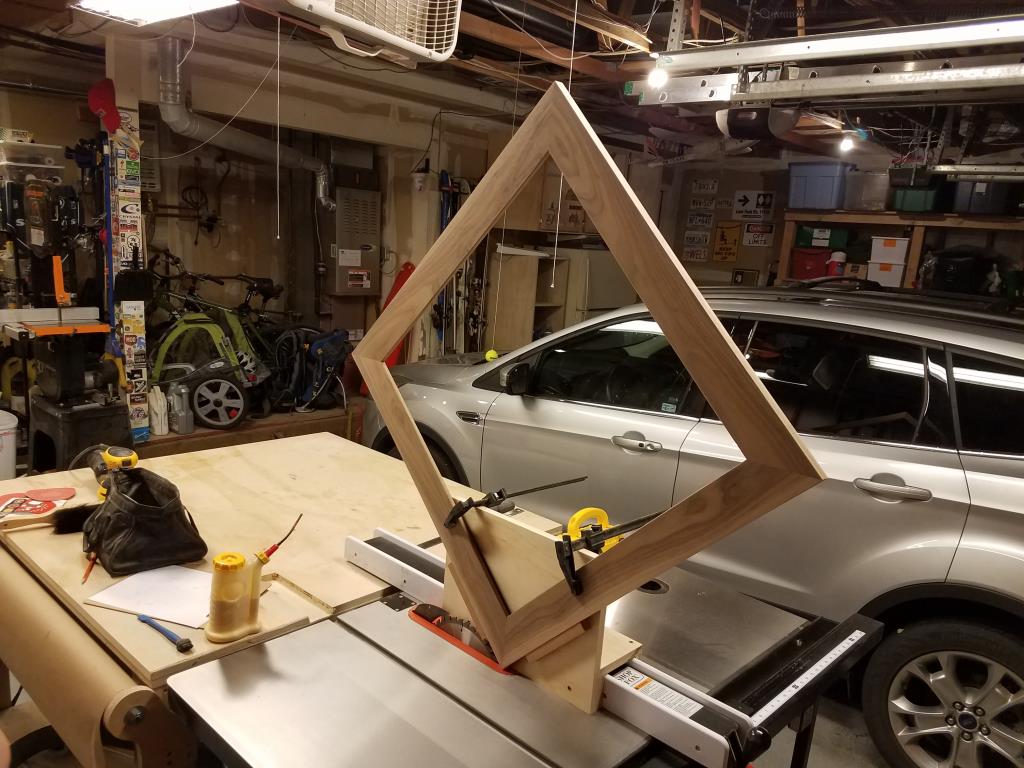
I then used a bunch of trial and error to cut splines that were exactly the right thickness. Those got glued into place, trimmed with a flush cut saw and sanded smooth.
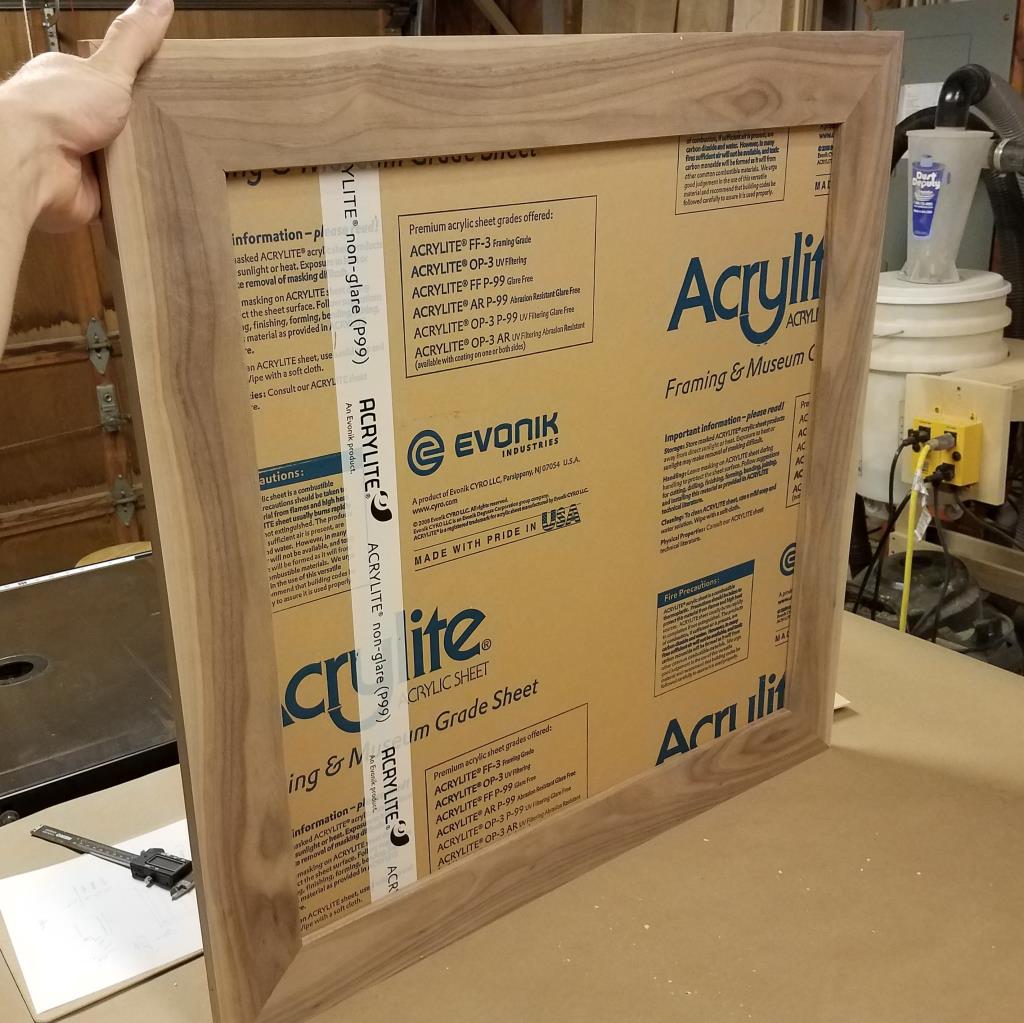
At this point, I felt like the project was really going to work so I headed to TAP Plastics and had them cut a piece of 5/64″ P99 non-glare acrylic. They can cut very precisely there and when I brought it home, it was a perfect fit. I left the protective paper on until the end though.
The “only” thing left was to cut a grid of very thin maple strips to hide the seems between the pictures when I put them down in a grid pattern. <insert tire screeching sound> How was that actually going to happen? When I originally thought this up, I envisioned a system of interlocking tiny dado cuts, but I had also planned for these pieces to be 1/8″ thick. Have you ever tried to cut 1/16″ deep dados that are perfectly positioned? My tests were not promising so it was back to the drawing board.
As I lay in the dark waiting for my son to fall asleep one night, it dawned on me that I could double up the grid pieces. So imagine a grid made out of 1/8″ thick by 1/4″ wide pieces of maple. Then make another grid and rotate it 90 degrees. Glue the two grids together and it should hold together pretty well.
That plan worked but wow, there were a LOT of extremely precise cuts to make. Thankfully my wonderful new table saw was able to slice consistent 1/8″ thick pieces off of a 2″ thick block of maple, rip them down to 1/4″ wide and then, with a crosscut sled, make all of those tiny little pieces to fit together. Any gap at all was very noticeable so I took my time and did it right. Now comes a long montage of 4 or 5 nights and voila! The grid was done.
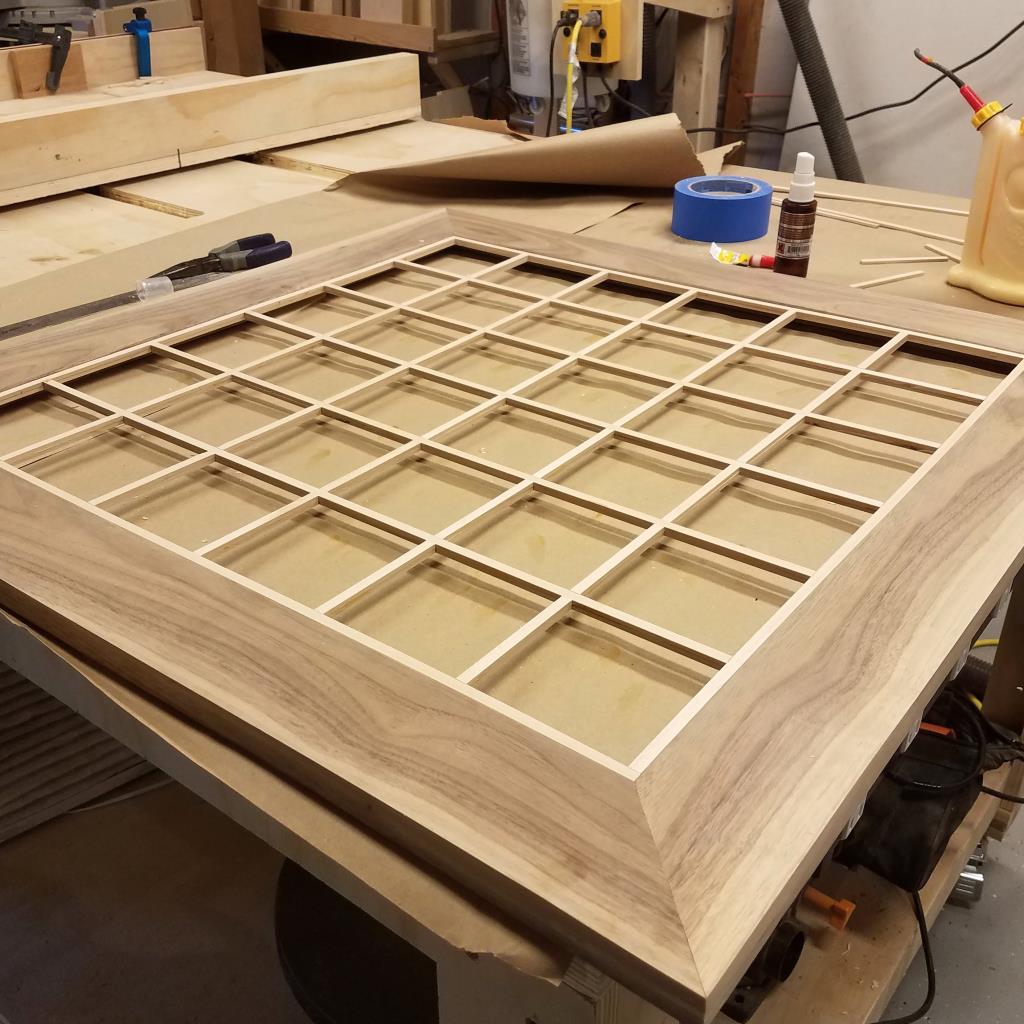
As I assembled the grid, I used a combination of CA glue and wood glue. The CA glue acted like a clamp and the wood glue gave it strength. I also used a couple pin nails to hold it in place against the walnut.
At this point, I finished the frame with a 50/50 mixture of boiled linseed oil and mineral spirits. I wiped on the finish, waited about 10 minutes and then wiped off the excess. I let it dry for 1 day between coats and I applied four coats. The final step in the finishing process was to apply clear Briwax and then buff it out. (This photo was taken before the wax was applied.)

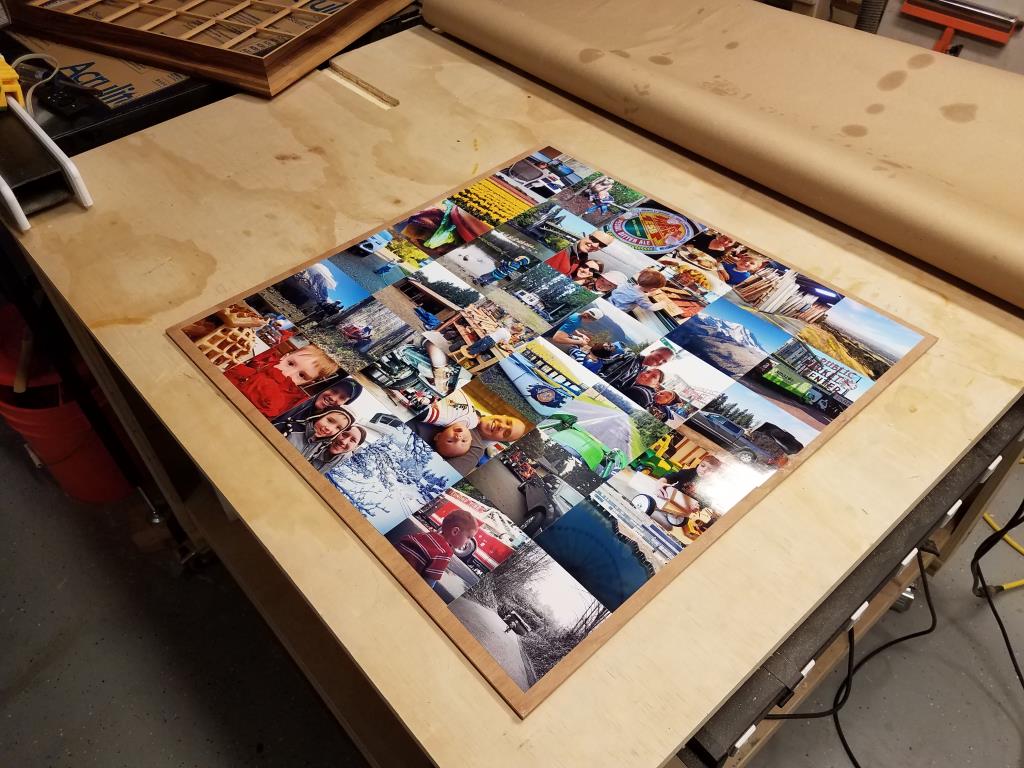
I cut a 1/4″ sheet of plywood to size and used spray adhesive to attach 36 pictures. To align them, I first placed the plywood under the grid and used a pencil to trace out all the boxes where the pictures should go. This process went pretty quickly and I took extra care (and lots of changes of disposable latex gloves) to make sure I didn’t get any adhesive on the pictures.
I put all the pieces together and then secured it all in place with a new point driver tool. That thing was a joy to use, but I feel like I need to make some more frames to make it worth the cost.
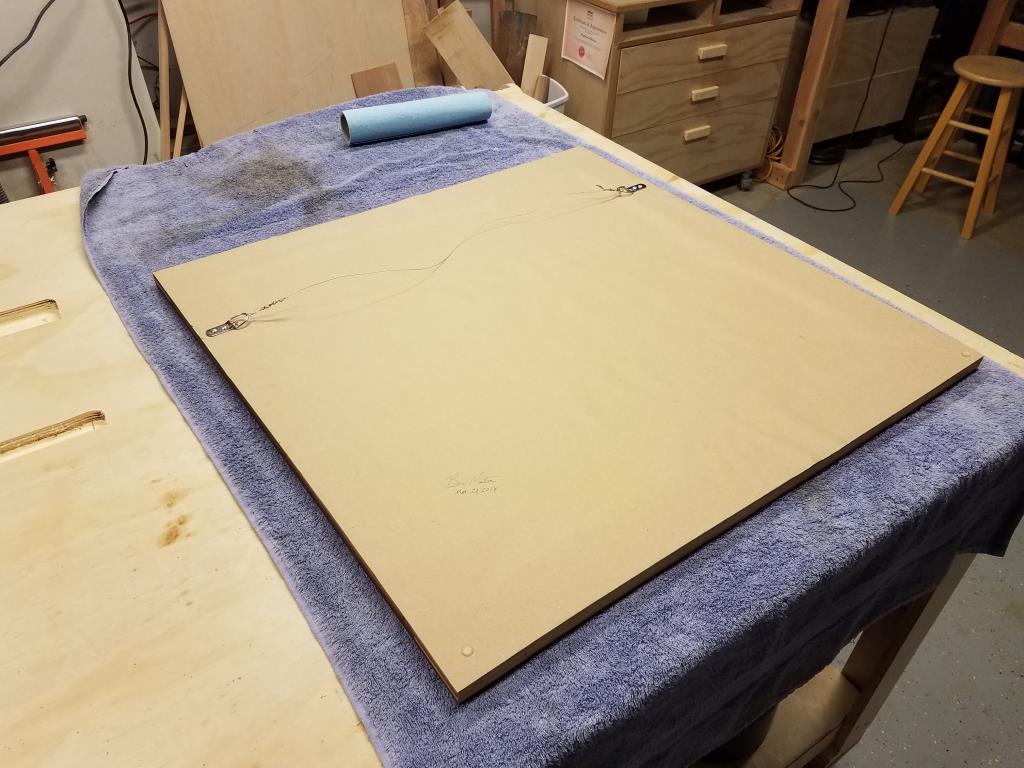
For the final step, I rolled out some fresh brown paper, traced out my frame, sprayed adhesive down on the paper and then set the frame on top of it. I cut around the frame with a knife and voila, I had a nice dust shield on the back. I have a couple very nice frames and I always wondered how and why they added that paper. Now I know. Thank you, again, David Picciuto for teaching me that trick!
The back of the frame also got a wire picture frame hanger and little rubber bumpers on the bottom of the frame so that it would sit straight on the wall.
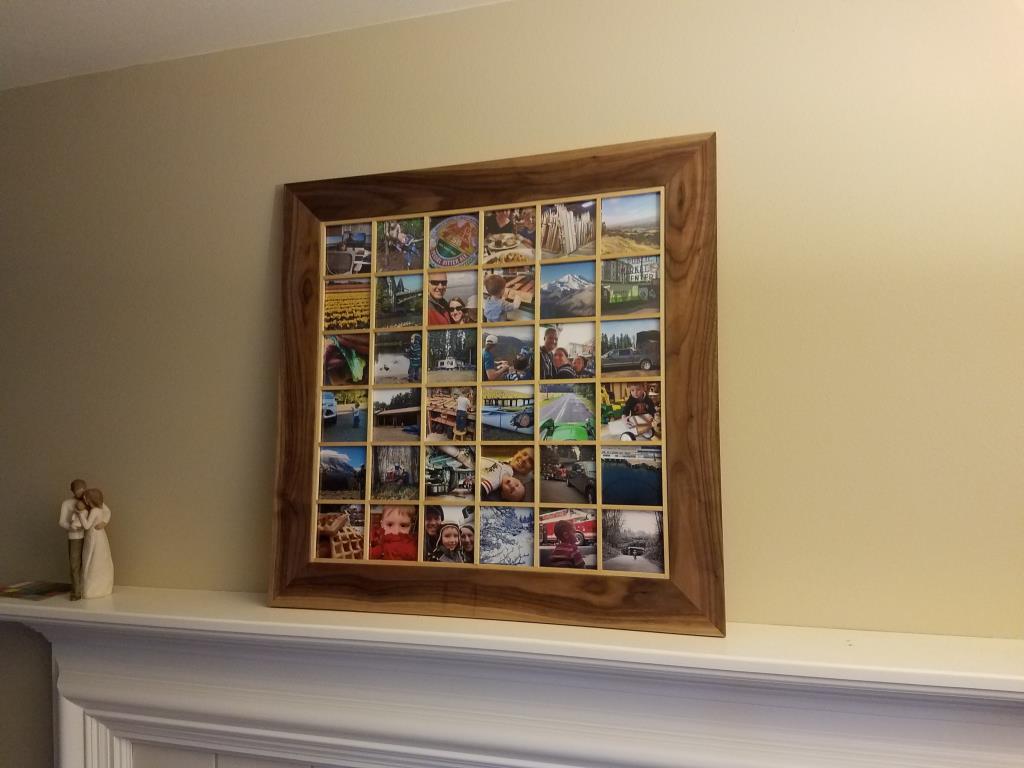
I don’t know yet exactly where this will end up in our house, but for how many times I thought the project was doomed, it turned out great! At some point I feel like we’ll want to replace the pictures, but all I have to do is cut out another piece of plywood and glue on some more pictures. I think next time, I’d probably do the collage on the computer and then print off a single large photo. That would be a lot easier to align.