
Before we re-landscaped the front yard, we had some hedges that came up to the front step. They weren’t beautiful, but they provided a convenient place for deliveries to be hidden. Now that we’ve removed the bushes, packages sit on our doorstep in plain view. We’ve never had a problem, but I’d prefer to have them at least partially obscured.
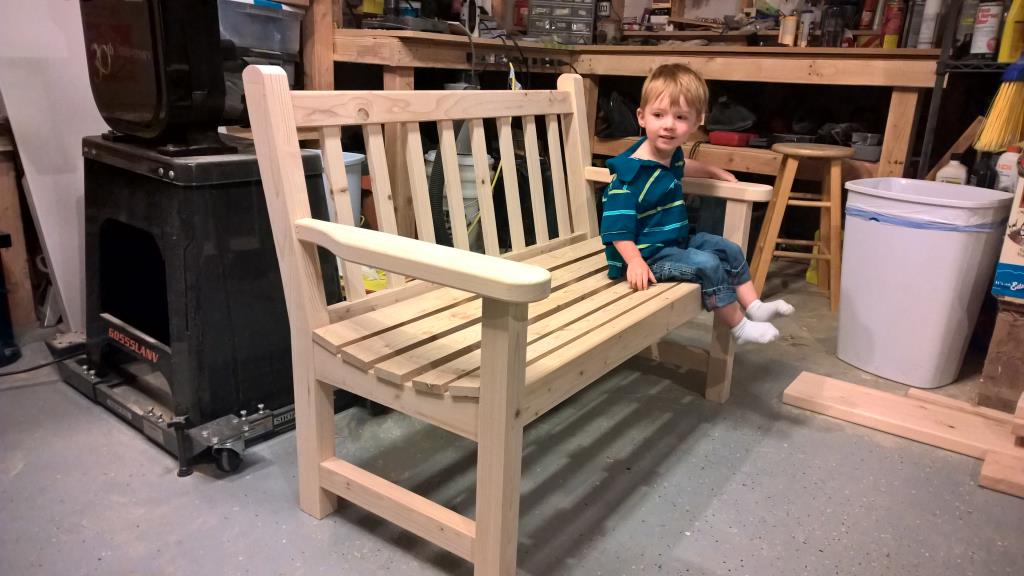
I decided to build a bench to fit on the step. Packages can be left under the bench, and, if necessary, I could even add a piece of wood to one end of the bench underneath the seat to really block the view from the street.
I used a SketchUp design file that is all over the web. (Unfortunately I don’t know who gets the original credit for this design. If you know, please contact me and I’ll give proper credit.) The design made heavy use of mortise and tenon joinery. While this type of joint is a staple in furniture woodworking, I’ve never done one myself. This seemed like a good learning project.
My first thought was to build this out of cedar since that handles outdoor weather well, but the cost quickly added up as I did the math. Instead, I ended up with hemlock fir (also purchased at Home Depot.) It’s pretty neat what you can do with standard dimensional lumber if you choose cleaner sections of the boards, trim off the rounded corners and run it through a jointer. This whole thing only cost about $30 in wood and I have some pretty big cutoffs left.
The four posts were wider than the 1 1/2″ I got from the boards so I used one full piece and then glued on half of another piece to get 2 1/4″. It actually looked reasonably good bare but after it was painted, the seam was completely invisible.
The mortise and tenon joints took me a very long time to complete as I fumbled my way through them. My joints got better and better as I went through the project though. I used a drill press to cut most of the mortises and then finished off the corners with a chisel. The next time I do it, I think I’ll try a router instead to get a cleaner mortise. I got the tenons with the bandsaw and that worked really well.
I hemmed and hawed a bit about how to finish the project. I like the look of natural wood, but it didn’t really fit the look of the front of the house. Plus I thought that the bench might weather unevenly since the outer half will be more exposed to sun and rain than the inner half. In the end, I put on a coat of Kilz primer and then used the same color as our exterior trim. I had an old can of that from the previous owners and the computers at Home Depot were able to match it perfectly! When I took the paint in to be matched, I explained that it was our house color. The lady replied “Do you live in an Army barracks?” I had never noticed it before, but instead of just being a dark gray color, it does actually have some green in it. Maybe I hadn’t noticed because it’s used for the house trim and it’s always against a light brown color.
I’m happy with the end result. It’s held together almost entirely without nails or screws. I did use a couple screws and nails just to ensure that the bottom seat supports don’t come lose over time. That part was at a weird angle and I didn’t want to screw up a mortise and tenon joint at that point in the project. The screw comes in from the back so nobody will see it.

(In the last photo, Elijah is trying to take a picture of me.)