Studio711.com – Ben Martens

tools

Incra Box Joint Jig Review

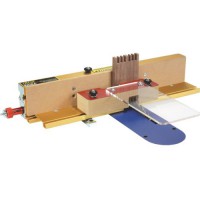
incraboxjointjigBox joints (sometimes called finger joints) are a handy and strong way to join two pieces of wood at a 90 degree angle. I’ve tried a couple times in the past to build my own box joint jig. It’s supposed to be easy but I could never get it to come out right. Finally I decided that I have more fun building stuff than building stuff to make stuff so I shelled out the money for the Incra Box Joint Jig.

It’s not something that is required to do the job, but it helps me get the job done faster and with nearly perfect results every time. It’s hard to screw this thing up, but plan to spend 30-60 minutes with the DVD to set it up out of the box. Now that I’ve got it all calibrated, I can whip out box joints of any size in just a few minutes. The design of the jig is also a little safer than a normal crosscut sled would be.

The only gotcha that I didn’t think of ahead of time is the size of my dado stack. Since I have a somewhat wimpy table saw, I opted for the smaller 6″ dado stack. Why make the motor spin all that extra metal around? That choice combined with this jig means that I can’t cut box joints into wood that is more than 1/2″ thick because the blade doesn’t come high enough out of the table. The 8″ dado stack would solve this problem, but truthfully I doubt it will bother me very often.

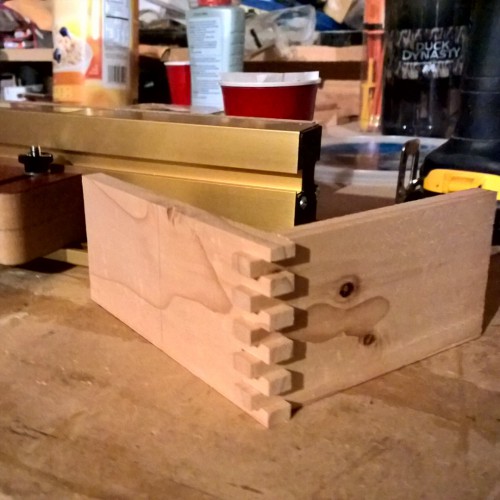
I’ll have some pictures of my first real box joint project in a post coming soon. For now, here’s a picture of my very first test. Obviously the fingers haven’t been trimmed down but you can see how nicely they fit together.
boxjointsample

Oscillating Spindle Sander

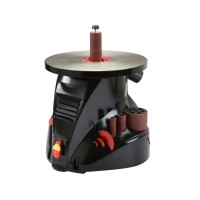
spindlesanderI’m really enjoying my Grizzly band saw. It comes in handy on almost every single project. Now that I have the band saw, I find myself cutting a lot more curves. Curves were tricky to sand with my existing tools so that meant a lot of sanding by hand. With pine or other soft woods, that’s not too bad, but sanding walnut and maple can take a lot of effort.

To speed things up, I purchased an oscillating spindle sander. You install cylinders of various sizes into the machine. Each cylinder is covered in sand paper and it spins around. That’s the basic idea, but if it stopped there, the place where the sandpaper connected with the wood would fill up with dust very quickly and reduce the effectiveness of the sandpaper. In addition to spinning, this machine also moves the cylinder up and down which gives the sandpaper a chance to “breathe” and throw off some of the dust. There’s also a dust collection port which pulls in dust right around the cylinder so it keeps the air pretty clean.

This setup is really handy for sanding curves. Even if you don’t have a cylinder that matches your curve exactly, it will still be better than using a flat sanding surface.

I picked this one up at Harbor Freight for $99 with a coupon. I figure this is a great tool to buy from them because it doesn’t need to be super precise or perfect.

My shop is pretty well-stocked for tools now. This was the last power tool on my list. Obviously there are always more tools you can buy, but I feel like I’m well-equipped to handle most of the projects that I’m interested in. I’d still love some kind of a CNC machine or 3D printer, but I keep reminding myself that I have access to them for free through work and I haven’t even taken advantage of that yet. Those purchases are going to be a ways down the road which is fine because it will give the technology more time to mature.

Now I need to get started on some shop furniture. My jointer, planer, router table, drum sander and this new spindle sander don’t really have a good home and they each alternate between the floor and a folding table. I’m planning a few more rolling carts with storage underneath.

Grizzly Band Saw

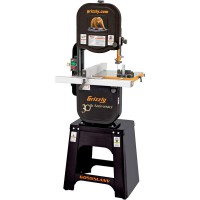
grizzlyg0555lanvThis weekend I placed an order for a big tool that I’ve never used before: a band saw. Specifically, it’s a Grizzly G0555LANV 14″ Deluxe Bandsaw Anniversary Edition. As I’ve gotten more into woodworking, I’ve realized that it is an incredibly useful tool that will open up a lot of builds that just aren’t feasible right now. This is sort of a middle of the road model. It’s not a smaller benchtop unit, but it’s a fraction of the price of some of the big name brands. Grizzly makes great tools with no frills. No, it’s not the same quality as a Powermatic, but it’s also going to be a quarter or a fifth of the price. For a home woodworker like me, even the Grizzly is probably overkill.

I struggled for a long time about whether to buy this new or used. I know that I could have saved money buying a used one, but since I have almost zero experience with a band saw, I did not believe that I could accurately evaluate a used model to know if I was getting a good deal or not.

I’m lucky to be located pretty close to one of Grizzly’s three showrooms, but I still chose to have it shipped from Bellingham. I was able to get it shipped for $35 (had to pay for curb side service since I don’t have a forklift to unload it myself) and for that much money, it was hard to justify borrowing a truck and making the ~2.5 hour round trip drive.

If you’re not familiar with a band saw, you might be wondering what it is good for. In general, pretty much anything you can do on a table saw, you can do on a band saw and it’s arguably a bit safer for some tasks such as cutting dove tails or box joints. Additionally, you can cut curves and you can resaw thick lumber and save wood. When I built Tyla’s jewelry box, most of the pieces were 3/4″ thick so that’s the stock that I bought. But a couple of the pieces only needed to be 1/4″ thick. If I had a band saw, I could have cut the board in half to make two thin pieces. Since I didn’t have one, I had to run it repeatedly through the thickness planer and turn 2/3 of the board into expensive saw dust.

I’m excited to get this thing set up and learn how to use it! Stay tuned for my first projects. I have a big stack of ideas waiting for me!

Saw Blades

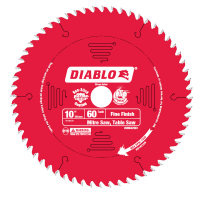
diablosawbladeNow that I finally have a shiny new saw, I decided that I started wondering how my old table saw would work if it had a nice new blade on it. Maybe I could get the old blade sharpened, but I kind of just want to start with a new blade and then take care of it properly from the beginning.

I started reading about saw blades and WOW, there are a lot of things to know about the blades. There are different diameters, different blade shapes, different angles for the teeth, different numbers of teeth, different thicknesses for the blade and the list goes on. This article from Rockler is one of the best ones I found for summarizing all the info but here is a quick summary of what I learned:

  • My table saw and my circular saw use the same diameter blade so I can buy one blade and use it either place.
  • Miter saws should generally have a higher tooth count since you are mostly doing cross cuts (~60-80 teeth) while table saw blades should have a lower tooth count since you are mostly doing rip cuts (~24-40 teeth.)
  • If you have less than a three horsepower motor, consider using a thin kerf (thickness) blade. The tradeoff is that the blade might deflect more, but since you are removing less wood, your motor can power through the cuts easier. You’re also generating less dust!
  • Most saw blades have a positive angle to the teeth meaning that they lean forward. Miter saws benefit from a slightly negative tooth angle. This gives you a more controllable cut and also helps to prevent the saw blade from pulling the back side of your wood up into the air.

The saw blade that came on my miter saw is probably better suited for my table saw so I’m hoping to move that over and then buy a higher tooth count blade for my miter saw.