Box joints (sometimes called finger joints) are a handy and strong way to join two pieces of wood at a 90 degree angle. I’ve tried a couple times in the past to build my own box joint jig. It’s supposed to be easy but I could never get it to come out right. Finally I decided that I have more fun building stuff than building stuff to make stuff so I shelled out the money for the Incra Box Joint Jig.
It’s not something that is required to do the job, but it helps me get the job done faster and with nearly perfect results every time. It’s hard to screw this thing up, but plan to spend 30-60 minutes with the DVD to set it up out of the box. Now that I’ve got it all calibrated, I can whip out box joints of any size in just a few minutes. The design of the jig is also a little safer than a normal crosscut sled would be.
The only gotcha that I didn’t think of ahead of time is the size of my dado stack. Since I have a somewhat wimpy table saw, I opted for the smaller 6″ dado stack. Why make the motor spin all that extra metal around? That choice combined with this jig means that I can’t cut box joints into wood that is more than 1/2″ thick because the blade doesn’t come high enough out of the table. The 8″ dado stack would solve this problem, but truthfully I doubt it will bother me very often.
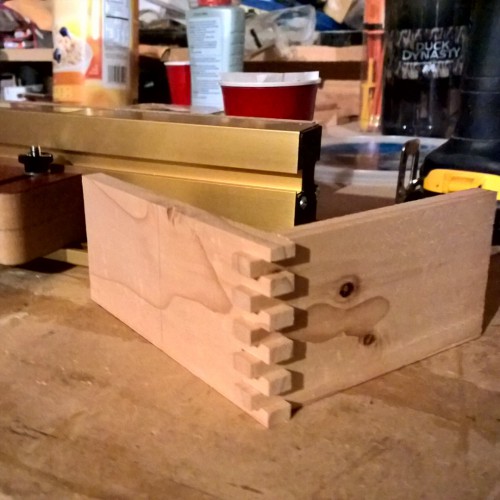
I’ll have some pictures of my first real box joint project in a post coming soon. For now, here’s a picture of my very first test. Obviously the fingers haven’t been trimmed down but you can see how nicely they fit together.