
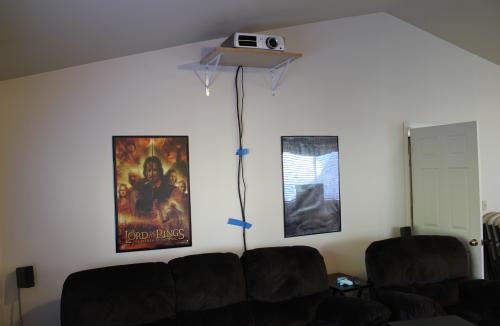
 Very shortly after buying the projector, I built a simple shelf mount for it. It was easier and cheaper than hanging it from the ceiling and the Epson 8350 has awesome lens shift so I was still able to get the picture in the right spot. However, the cables were left dangling down the wall. I finally got around to fixing that this past weekend.
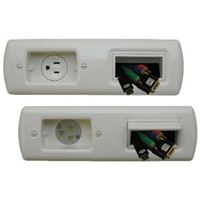
The key to the project was finding a good way to get power up to the projector. I didn’t just want to add an outlet up there, because I want the projector to run off the battery backup system in the AV rack. Enter the PowerBridge. It’s effectively two outlets connected by a piece of Romex. The special thing is that one outlet is male and the other is female. That means you can connect your extension cord to the outlet at the bottom and run it to whatever power source you want. There is also an opening for HDMI cables to come out. This is a great way to wall mount your TV without paying for an electrician! The kit had everything I needed except that I needed to buy more Romex because the included 6’ length wouldn’t reach up to the projector.
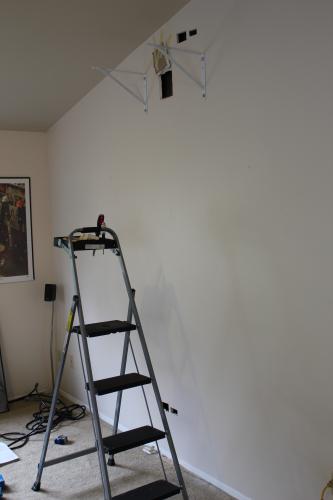
The other trick to this projector is mounted near the ceiling and this room has vaulted ceilings. That means that there is a ceiling joist between the projector and the floor. I had to cut an extra hole in the drywall just above the hole and drill through to feed the cables down to the floor.
The extra cut is the part that took the longest. I did a pumpkin cut on three sides, folded it back and then made my holes. After running the wires, I folded the drywall back in place and applied spackle and sanded until it matched nicely again. I sprayed on some orange peel wall texture and it’s almost as good as new. Obviously it needs a coat of paint to completely match, but I’ll do that later once the rest of the project is done.
Next up: mounting a projector screen.

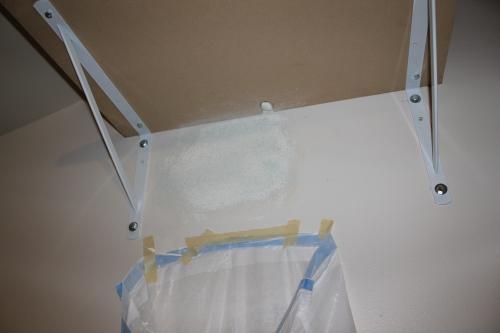
In picture #3, the drywall wouldn’t quite stay flush so I applied a little glue and taped it in place until the glue dried. And in picture #4, yes, that’s a trash bag taped to the wall. I had it there to catch most of my sanding dust and any of the spackle that I might drop.