

I help with a lot of the audio visual stuff at our church. It’s slowly being upgraded from “random stuff that people were trying to get rid of and donated to church” to actual AV equipment that is fit for the purpose. In 2014, we upgraded an ancient VHS camcorder to 1080p Canon Vixia camcorders. They were… sufficient. They worked but since we don’t have a ton of light in the sanctuary, the cameras struggled to get a good image. It was blurry and there wasn’t much detail in the image. Additionally, the mounts had to be easily adjustable for the times we needed to point the cameras at something else, but that also meant that they frequently got bumped and needed to be adjusted back to level.
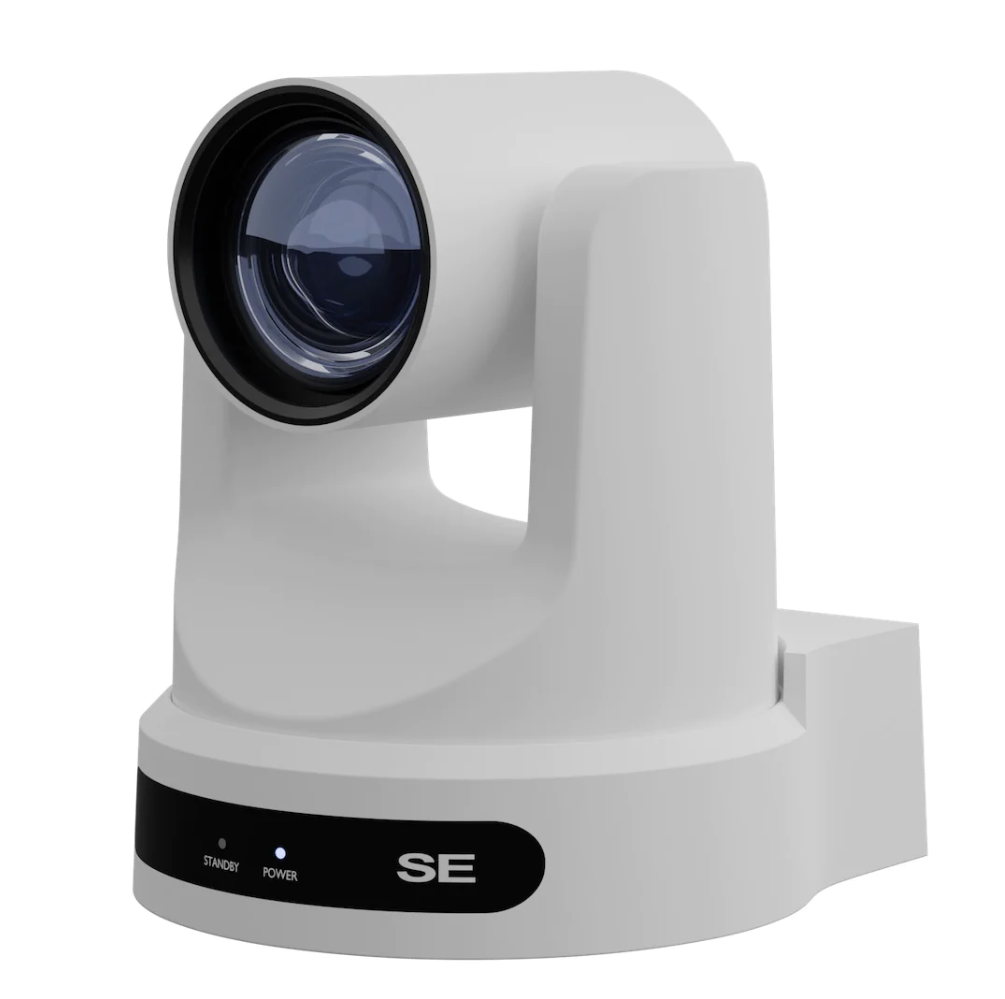
This year we made a major upgrade to the Move SE cameras from PTZ Optics. They are 1080p cameras but the image sensor is 1/2.7″ versus the 1/4.85″ sensor on the Canon’s which means they do a lot better in our low light scenario. They also are pan/tilt/zoom cameras and can be controlled via remote, over the network, or even with the MIDI protocol. These cameras come in 12x, 20x, and 30x optical zooms. There’s a zoom calculator on the PTZ Optics website so I was able to stick with only the 12x zoom cameras which seem to fit our space perfectly.
They have a huge range of features that we won’t need for a while, but it’s nice to know we have room to grow. For now the HDMI comes out of the cameras and goes into our Blackmagic ATEM Mini Pro video switcher and the cameras are powered via Power Over Ethernet cables. We aren’t using the PC software much yet, but there’s a lot that can be done with them in that configuration too.
When I plugged them in for the first time, I was nervous that we had spent a bunch of money for somethign that wouldn’t be much different, but these cameras exceeded my expectations. Here’s a short comparison video:
Now that we have two cameras, I’m already itching to buy one more. We typically have one wide shot and one zoomed in shot but it would be handy to have one more for random purposes. I caught these on a Black Friday sale for 15% off so maybe I’ll add a third one next year.
I like to tell people that no matter what you’re interested in, there’s a way for you to use your talents and interests when you volunteer at church. This is a great example. I don’t know in what other situation I’d get a chance to play with fun electronics like this!
And of course, if you ever want to come see these in person, I’d be happy to give you a tour any Sunday morning! www.calvarylutheranbellevue.org
Every year I write about how every year we buy a new ornament for our tree while we’re on a family vacation. This year our big trip was to Moab and we enjoyed seeing all the lizards running around. This lizard on a rock seemed like the perfect addition to our tree.

You can see our past ornaments in these posts: 2022, 2021, 2020, 2019, 2018, 2017, 2016, 2015, 2014, 2013, 2012, 2011, 2008-2010
Welcome to another Tesla Tuesday!
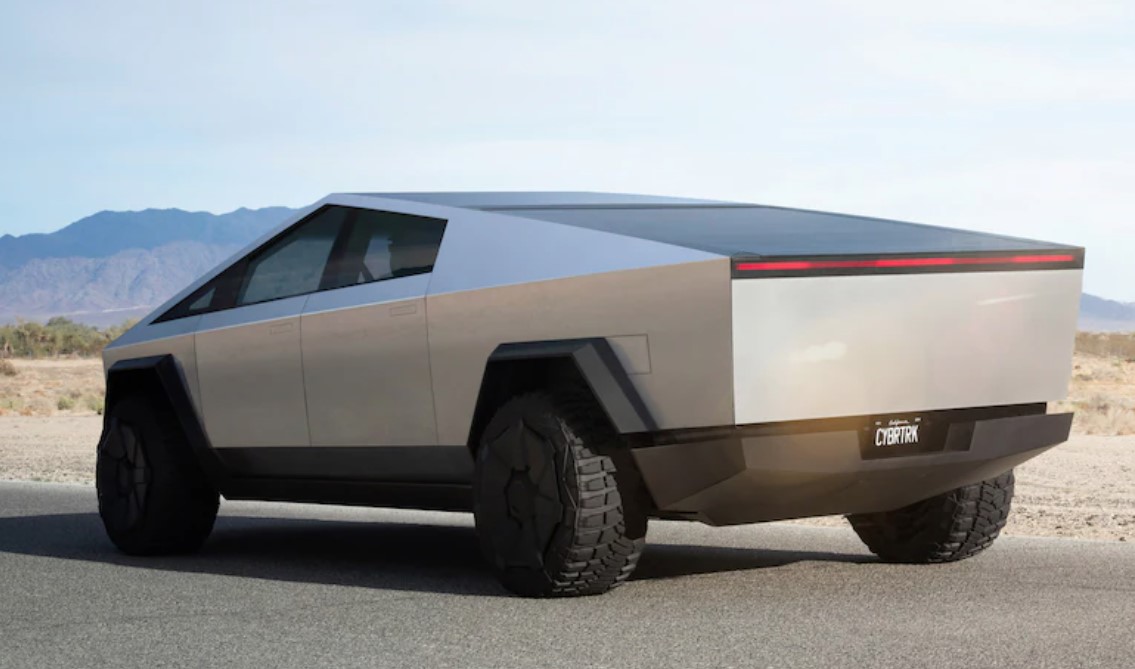
The Tesla Cybertruck was released last week. It was announced all the way back in 2019 and now customers are finally taking deliveries. Let’s start with the positives…
The truck is an incredible feat of engineering. The AWD version does 0-60mph in 4.1 seconds and the “Cyberbeast” model does it in just 2.6 seconds. It does all that while having almost as much payload and towing capacity as my maxed-out internal combustion F150. As a visual to help explain how wild it is to cover both ends of the speed/towing spectrum, Tesla released this video of a Porsche losing a drag race to a Cybertruck… while the Cybertruck is also towing the same Porsche model.
There’s a video showing it in winning handily in a pulling competition against other EV trucks and a diesel F350. There’s also a video of the truck being “bulletproof” or at least bullet resistant. During development it was claimed that the truck would also be able to cross open water though I haven’t seen that independently tested yet.
So yes, it’s a technological marvel, but (and this is a big but)… yuck. It looks like a Pontiac Aztec had a baby with a kindergartener’s drawing of a truck. Teslas have extremely low coeffecients of drag and I’m sure that factored into the design, but still, I know that design is subjective, but I have zero interest in driving this eyesore.
When it was announced four years ago, I disliked it so much that I worried it would sink the whole company. Now we’re in a world where Tesla is probably going to claim the title of best selling vehicle on the planet of 2024. They will probably be ok even if the Cybertruck is a flop.
But will it be a flop? I doubt it. It might level out to be the lowest selling of their models after the initial hype, but I think they’ll sell enough of them to cover their development costs. Tesla incite a fan reaction only seen in companies like Apple. They can make anything they want and people will line up to buy it and rave about how great it is.
If I was replacing my internal combustion F150 today, I’d probably end up buying another gas truck. Rivian is good but their trucks are small for what I want. The electric F150 is intersting but I don’t trust the traditional manufacturers to make a good EV or back it up with a good ownership experience. We’ll get to a point where big trucks make sense as EVs, but I think today the best we can do is smaller trucks like the Rivian R1T.

In May, I built my own 36×16 LED panel. The project was a lot of fun to build and taught me a lot, but honestly, I haven’t used it much since then. The original plan had been to build two of them and use them as Christmas decorations, but I can probably count on one hand the number of times I’ve turned it on. The software side of things was a mess which is a bit ironic given my profession. I had improved on the tutorial by writing my own app that ran on the desktop and communicated directly with the ESP8266 board. The board had very simple firmware which just received a stream of bytes and displayed it. That worked ok and I got a pretty good refresh rate, but the main issue was that after a few minutes, the board would stop updating and I couldn’t figure out why. After a long day of coding for my day job, I could never convince myself to spend time debugging this.
Fast forward to late November when I was watching a video from “The Hook Up” on YouTube about his Christmas light setup. It was at that moment that I realized that most of these Christmas light displays and lots of maker projects run on an LED control package called WLED. It’s free and open source and it’s very customizable. Could it work with my custom matrix?
About an hour later, I had it working, and most of that was me just fumbling around learning things. There was already a version of WLED that was compatible with my ESP8266 board so I loaded it on and instantly had a webserver that I could access from my desktop or phone. The built-in software is fantastic but there is also a big ecosystem of projects built on top of WLED if you want, for example, to display an animated gif on the matrix.
In the last week I’ve had it on more than I did in the previous six months. While it’s too late to build another one to use for the front window for Christmas, it has me thinking about next year.
Let me start by saying that I know this is a duplicate post, but unless you’ve been reading since 2008, you probably haven’t seen this one before. Besides, I think it’s worth retelling the story of the programming contest that eventually got me into Microsoft.
In college, I joined a programming club sponsored by Microsoft. I don’t remember exactly what the club did, but I remember them giving out free food which is about all it takes to get a college kid to join a club. They also handed out a thick set of CDs that represented an early beta of Visual Studio .NET. This was the first time the world had seen the .NET languages, and to get us into the tool, the club sponsored a programming contest in 2002 which would have been the end of my senior year. The rules of the contest were to write something that uses as many languages and features of .NET as possible. They wanted us to show off the capabilities of the language.
I had been spending a lot of time working on building a giant library of digital Lego specifications in a tool called POV-Ray and making digital Lego movies, but the slowest part of that process was rendering out the movie frames. It would take about 15 minutes to render a single frame at a measly 320×180 resolution. So my programming contest entry was a system that would orchestrate the rendering of a movie over a bunch of different computers.
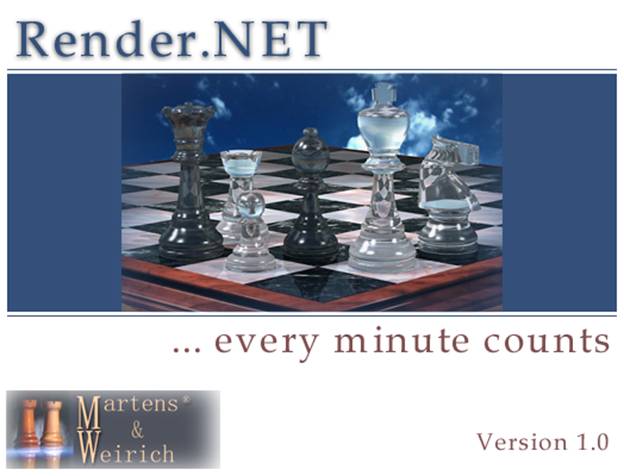
The main server had a list of all the frames that needed to be rendered. Clients would connect via a web API and request work. They would be sent the text file representing a single frame, render the file locally in POV-Ray, and then send the image back to the server. To score more points, the client, server, and web API were all written in different .NET languages and all the interaction was tracked in a SQL database that had a web front end for displaying progress and participation points.
It took me FOUR MONTHS of work to get this all going, but with help from a friend, the final presentation really wowed the judges and we captured 85% of the first-place votes. If I remember correctly, the grand prize was an original Xbox and an HP Jornada with a WiFi card.
I did use the software to get rendering help with some Lego movies. The stories are garbage but I’m still proud of the technology that went into them. This stuff is simple now, but 20 years ago, it was unique. You can view an older post about it here: https://studio711.com/the-lego-movie/.
So how did this land me a job at Microsoft? Fast forward four years. I had just finished up my Masters degree and was looking to leave New Jersey. I had been trying to apply to Microsoft but it’s a challenge to make yourself stand out in the veritable flood of applications that they receive. I decided to cold call the head of the Microsoft club from Purdue. We hadn’t talked in four years, and I had to get his contact info through a mutual friend, but it worked! He happened to have a position open on his team and within a couple weeks, I had made it through the interview process and had a job offer.
One of my main recommendations for kids going into high school and college is to do more than the bare minimum. Getting good grades is important, but you need to be an interesting human too. “Passion” is hard to define, but I know it when I see it in a job candidate and that passion goes a long way to opening doors for new opportunities.

I wrote a while back about using some digital software to take the output from my piano and run it through an extremely high quality piano recording. I’ve quietly continued to make recordings of the various pieces I learn. Some of them end up on my YouTube channel. I usually post them there if it was especially hard for me to learn and/or I don’t see any other recordings of that particular arrangement. When you’re learning a new piece, it’s nice to hear someone else play it first so that’s my contribution.
In the last couple weeks, I’ve found some new (to me) technology that has opened up new possibilities: I’m now able to take a piece of sheet music, and turn it into a recording without ever touching a piano. Here’s the process:
The output sounds great! I suspect that many people would never know that it was produced without touching a piano. I’m interested in playing with the MIDI file even more to see if I could make it sound even more realistic. I’m curious how it would sound if I wrote some code to slightly alter the timing and velocity of each note to give it a bit more of the variability that you’d get from a human.
Today I’m using this to help our choir at church. I can easily scan in each piano piece and make recordings of the full accompaniment without taking the time to learn it. I also make manual recordings (because it’s faster) of the individual parts. All those files get posted to a share and now everyone can easily practice at home.
Have I ruined music by making it too nerdy? Not in my book. I still end up needing to play a lot of this live, but it’s really handy to have all these tools in my back pocket to pull out when they fit the situation.
P.S. If you’re not overwhelmed by software recommendations yet, I’ll throw in one more recommendation for Nail the Pitch which is a free app that tells you what note you are singing. As I practice the choir song, I can visually see if I’m hitting the right notes.
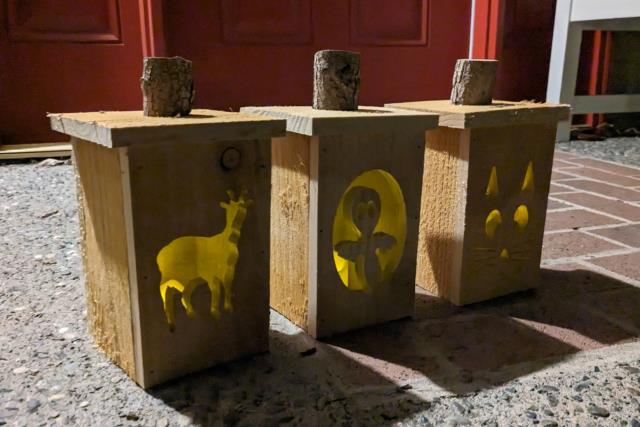
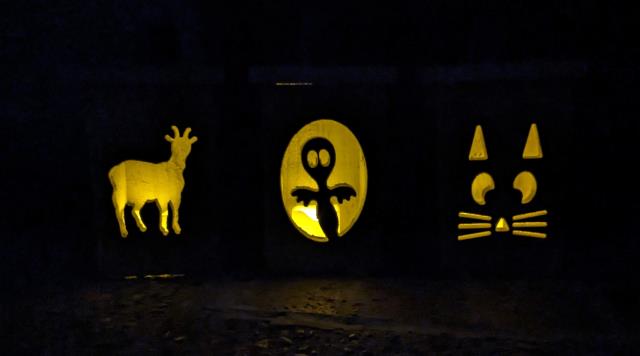
We usually carve pumpkins for Halloween but it’s a messy affair and then the pumpkins end up rotting on the front step. This year, we decided to try making “pumpkin boxes.” You may have seen these on Etsy or other craft sites.
I bought a couple fence planks and quickly had them cut into the pieces for a box. I used the CNC to carve the images. Tyla picked a goat, I picked a ghost, and Elijah drew a cat face. A quick glue up later, and I was done. I left the bottom open so we could set them on top of an electric candle light and I used pieces of a branch on top of the lids to look like a stem.
If we do this again next year I think I’ll get the family more involved in the design of their pumpkins and the assembly of them. We might also consider making some variable sizes.

This is the time of year when skiers start checking the weather multiple times per day wondering when their favorite ski area is going to open. Since 2006 I have been keeping track of the opening dates for Whistler Blackcomb, Mt. Baker, Stevens Pass, Summit at Snoqualmie, and Crystal Mountain. As you read this table, keep in mind that some of these dates are restricted to specific types of passes, and in almost all cases, conditions are thin. If you want full access to the mountain without fear of destroying your gear on rocks, you usually need to wait until January.
| Whistler | Baker | Stevens | Summit | Crystal | |
| 2006 | 17-Nov | 13-Nov | 17-Nov | 2-Dec | 15-Nov |
| 2007 | 17-Nov | 29-Nov | 18-Dec | 15-Dec | 1-Dec |
| 2008 | 26-Nov | 14-Dec | 18-Dec | 11-Dec | 27-Nov |
| 2009 | 14-Nov | 12-Nov | 19-Nov | 14-Nov | 11-Nov |
| 2010 | 19-Nov | 20-Nov | 1-Dec | 25-Nov | 19-Nov |
| 2011 | 18-Nov | 18-Nov | 19-Nov | 19-Nov | 18-Nov |
| 2012 | 17-Nov | 21-Nov | 20-Nov | 8-Dec | 21-Nov |
| 2013 | 16-Nov | 21-Nov | 16-Nov | 10-Jan | 20-Nov |
| 2014 | 22-Nov | 20-Dec | 20-Dec | 28-Dec | 21-Nov |
| 2015 | 19-Nov | 19-Nov | 4-Dec | 11-Dec | 21-Nov |
| 2016 | 23-Nov | 25-Nov | 29-Nov | 6-Dec | 25-Nov |
| 2017 | 17-Nov | 16-Nov | 16-Nov | 2-Dec | 15-Nov |
| 2018 | 22-Nov | 12-Dec | 12-Dec | 14-Dec | 23-Nov |
| 2019 | 28-Nov | 15-Dec | 18-Dec | 15-Dec | 29-Nov |
| 2020 | 26-Nov | 20-Nov | 4-Dec | 4-Dec | 26-Nov |
| 2021 | 25-Nov | 14-Dec | 15-Dec | 14-Dec | 4-Dec |
| 2022 | 24-Nov | 17-Nov | 2-Dec | 2-Dec | 18-Nov |
| Average | 19-Nov | 26-Nov | 1-Dec | 8-Dec | 21-Nov |
Merry Christmas
LUKE 2
THE BIRTH OF JESUS
1 In those days Caesar Augustus issued a decree that a census should be taken of the entire Roman world. 2 (This was the first census that took place while Quirinius was governor of Syria.) 3 And everyone went to their own town to register.
4 So Joseph also went up from the town of Nazareth in Galilee to Judea, to Bethlehem the town of David, because he belonged to the house and line of David. 5 He went there to register with Mary, who was pledged to be married to him and was expecting a child. 6 While they were there, the time came for the baby to be born, 7 and she gave birth to her firstborn, a son. She wrapped him in cloths and placed him in a manger, because there was no guest room available for them.
8 And there were shepherds living out in the fields nearby, keeping watch over their flocks at night. 9 An angel of the Lord appeared to them, and the glory of the Lord shone around them, and they were terrified. 10 But the angel said to them, “Do not be afraid. I bring you good news that will cause great joy for all the people. 11 Today in the town of David a Savior has been born to you; he is the Messiah, the Lord. 12 This will be a sign to you: You will find a baby wrapped in cloths and lying in a manger.”
13 Suddenly a great company of the heavenly host appeared with the angel, praising God and saying,
14 “Glory to God in the highest heaven,
and on earth peace to those on whom his favor rests.”
15 When the angels had left them and gone into heaven, the shepherds said to one another, “Let’s go to Bethlehem and see this thing that has happened, which the Lord has told us about.”
16 So they hurried off and found Mary and Joseph, and the baby, who was lying in the manger. 17 When they had seen him, they spread the word concerning what had been told them about this child, 18 and all who heard it were amazed at what the shepherds said to them. 19 But Mary treasured up all these things and pondered them in her heart. 20 The shepherds returned, glorifying and praising God for all the things they had heard and seen, which were just as they had been told.