
 We’ve never had a screen on the window in the master bathroom. At first it wasn’t a big issue since we never open that window, but when I have to seal the grout, it’s nice to be able to open the window. And with a big tree right outside, I always have visions of a squirrel or a bird making its way inside.
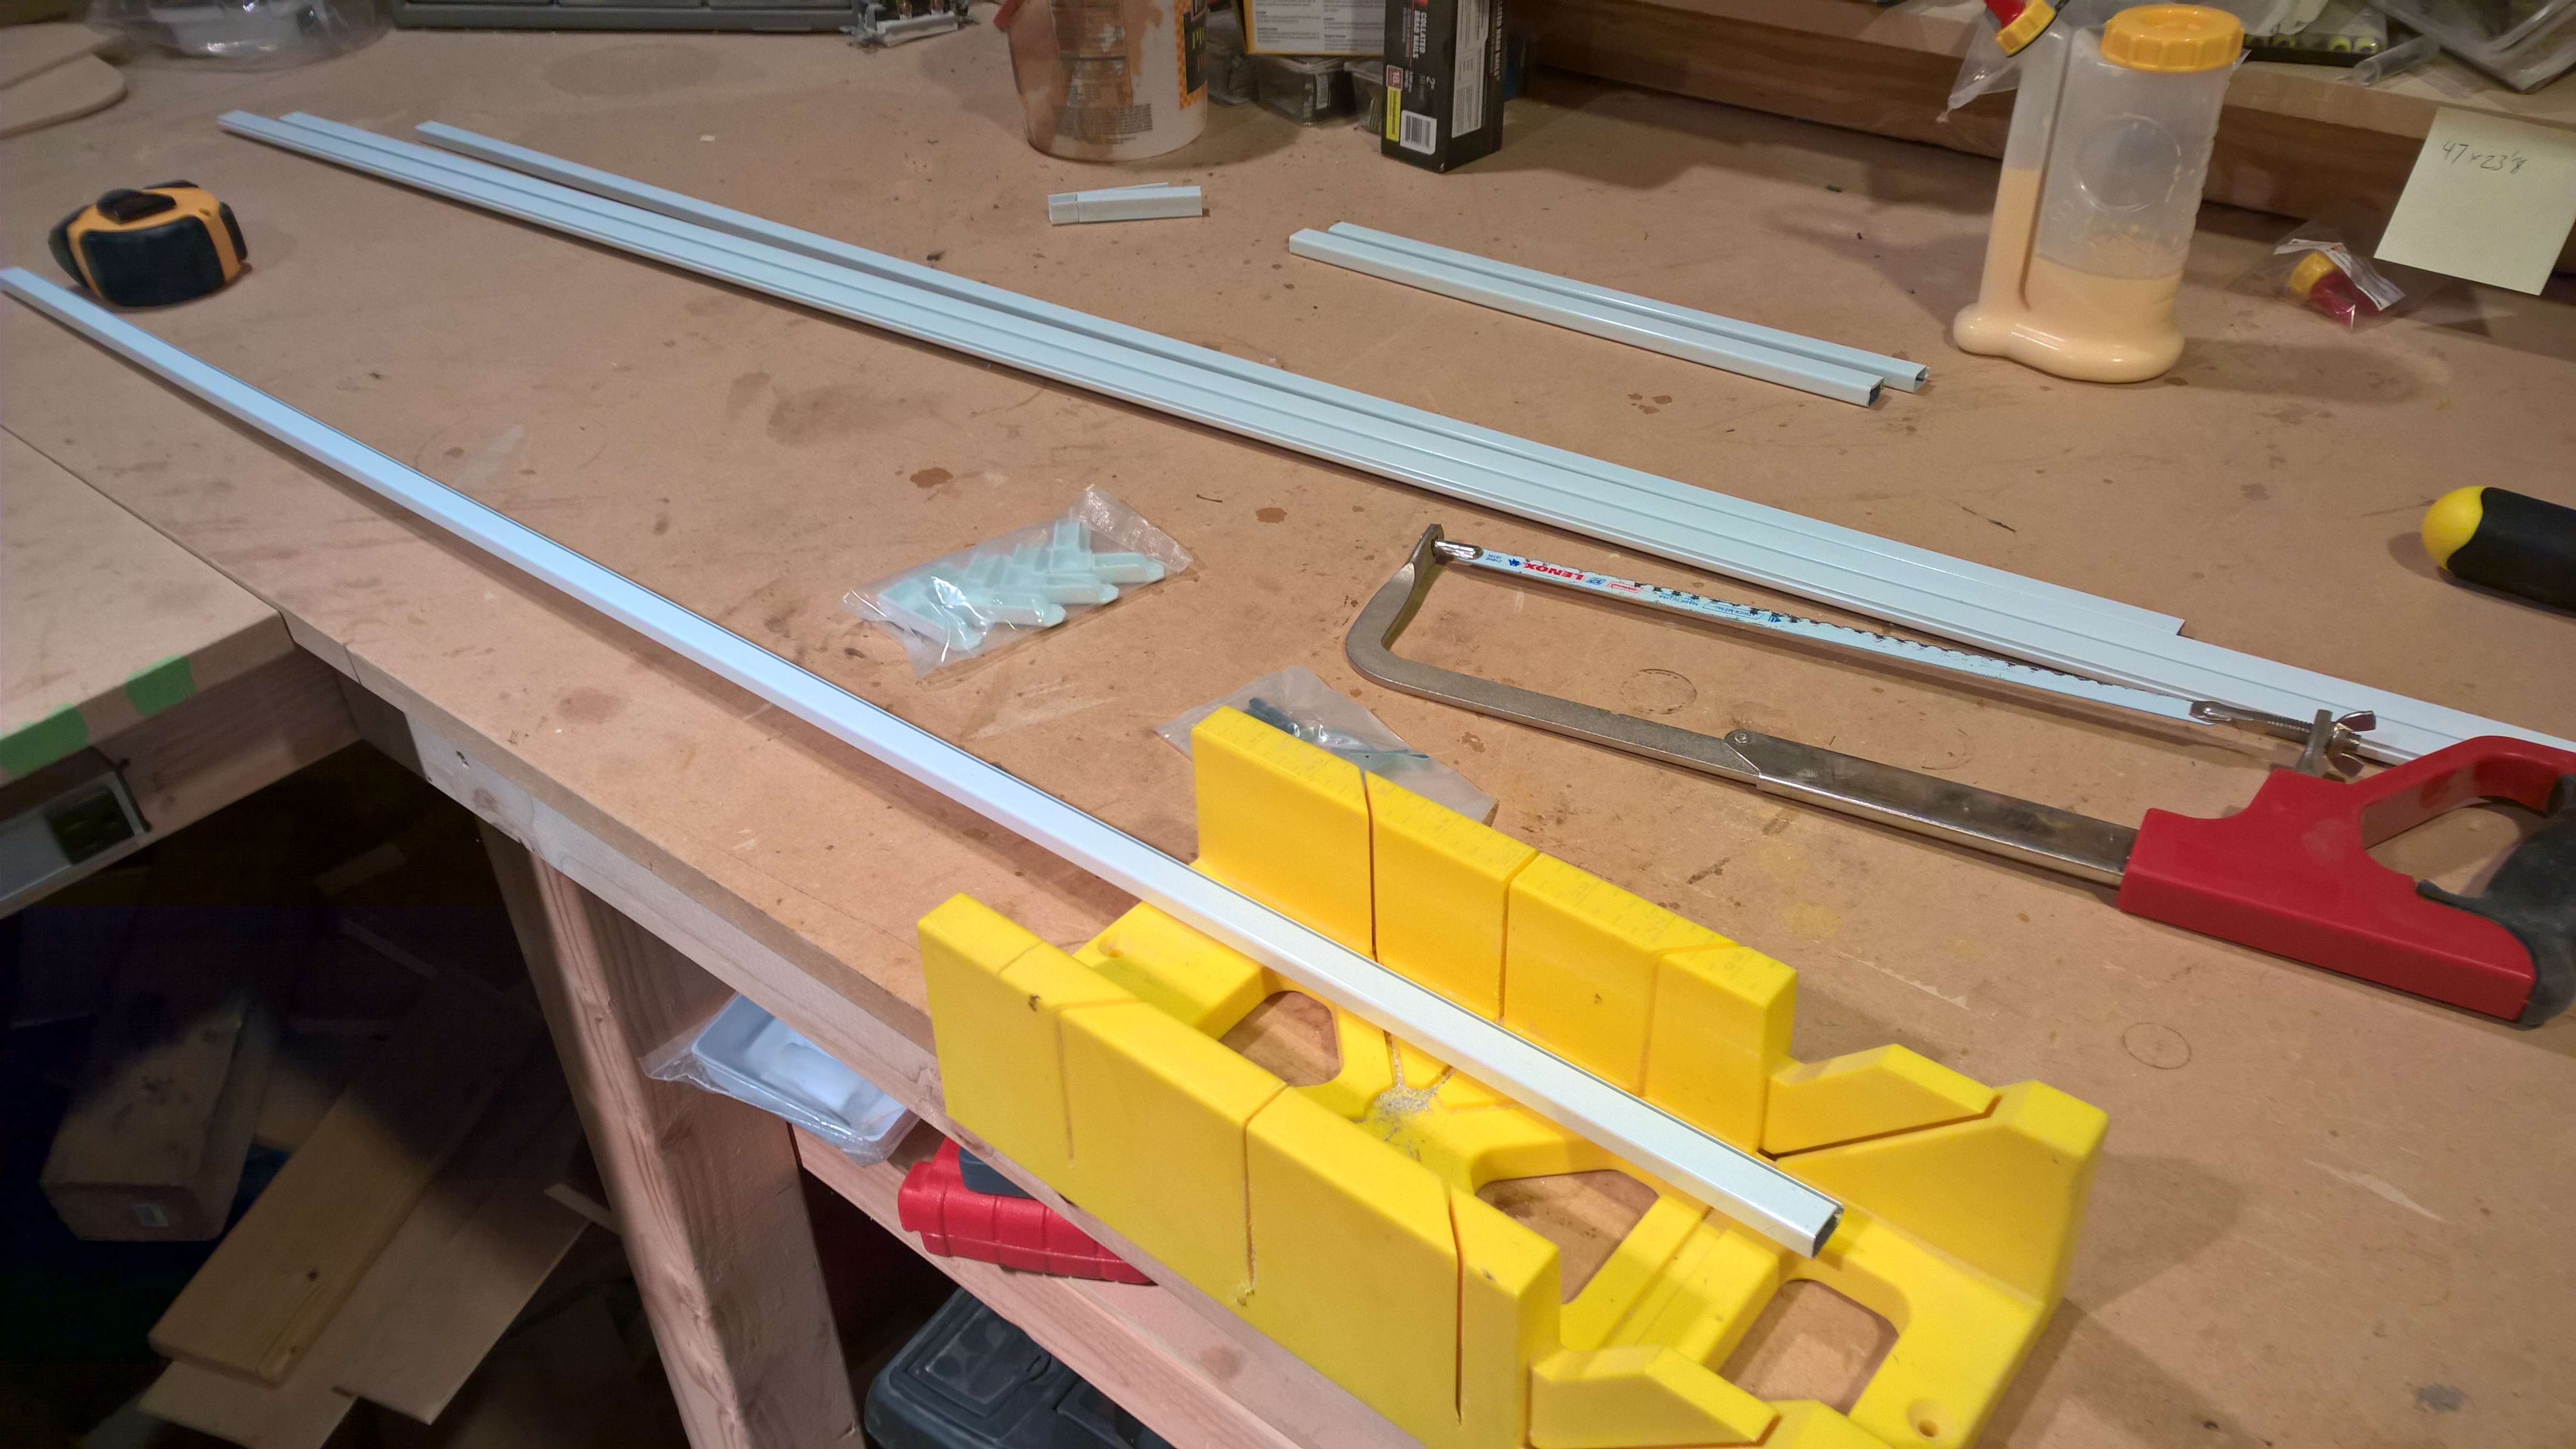
So I headed to Home Depot and bought the stuff to make a screen. Then I returned it and bought it again. Did you know that there are two different thicknesses for the screen frame? I didn’t, but now I do. As I was building the frame, it dawned on me that this is an easy home repair that some homeowners might not know how to do.
You can find plenty of YouTube videos to show you how it works, but here are the basic pieces. There is a metal frame that consists of four pieces cut squarely and held together with plastic corners. The plastic pieces slide tightly into the tubes and make a pretty strong joint. Some springs also slide onto the frame on one side. Then there is a groove that goes along the outside of the frame. Screen material is unrolled over the frame and then a thin piece of rubber gets jammed down into that groove and it stretches the screen material tight. Save yourself some grief and just buy the littler roller tool to help push the rubber into the groove. Finally you cut off the excess screen material and voila!
I redid every one of the screens in our house back in 2012 since the previous ones had all been torn up by cats. Now that I’ve built this one for the bathroom, I’m hopefully done for a while. It’s a handy skill to have in your bag of tricks though because it’s pretty easy for the screens to get damaged. Repairing them yourself is way cheaper than paying someone else to do it.