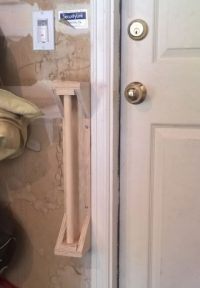
 The door to our garage has a spring in the hinge so it closes automatically. That’s generally handy but I’m waiting for it to smash Elijah’s hand. He has to hold onto the door frame to step down. So to help keep all his fingers attached, I pulled out some scrap wood and built a little hand hold for him. It was a one night project using an old broom stick as the round piece to grip and so far it’s working out really well.
Mallets
After a couple failed projects, I was looking for a quick win and decided to make some wooden mallets. They’re handy for assembly wood parts. The big wood face is gentler on your project than a standard hammer. There are a lot of different ways to approach the project, but I chose to use Jay Bates’s laminated method.
First I had to choose some wood. When we got married, Tyla already had an old, beat up oak dining table. She always dreamed of refinishing it, but last summer we agreed it was better to just get rid of it instead of continuing to store it. I salvaged quite a bit of wood from it. It has just been sitting in the side of the garage and I decided to make use of it. I grabbed one leaf and rain it through the planer to get all the old finish off of it. It cleaned up nicely.
After that the rest was pretty simple. The head is built from three layers of wood with the middle layer being chopped in half to make a hole for the handle. The handle is tapered so it slides into the hole and sticks there. When finished, the handle can be detached from the mallet by just pounding it through. There’s not much too it but I think it will come in handy.
I made two thinking that I’d probably screw one up, but both came out reasonably nice so I gave one to Tim since we were heading to his house for dinner that night.

Train Track Fail
I’ve had a lot of projects go really well lately, but there’s one that has continued to haunt me and I’m officially tossing the idea. I give up.
Tyla found some motorized Thomas the Tank Engine trains for Elijah. They aren’t the size of the standard wood tracks, but they do make plastic tracks. I thought it would be fun to make my own tracks because then we could have whatever pieces we wanted and it could exactly fit on his play table.
The first few attempts involved etching the wood repeatedly to burn in the tracks. I tried multiple times and finally got the interlocking knobs to fit properly, the curves to be big enough that the train could make the turn, and the rails to be the right width. The problem was that they were never deep enough to hold the train in place. When you’re etching wood, you can only take so much off at a time before it starts the wood on fire, so these attemps amounted to hours and hours in front of the laser cutter watching it slowly take away material. Here’s one of my best attempts with that method. It was rare for a train to make an entire circuit around the track without falling off and I eventually tossed these in the trash.
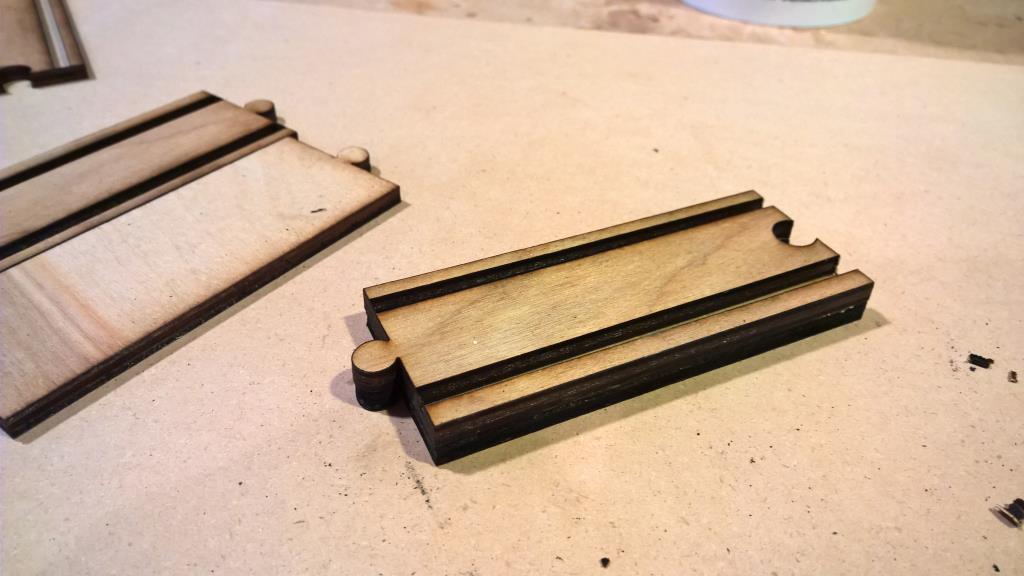
I gave up for a couple months and then had the idea that maybe I was approaching the problem backward. Instead of trying a reductive process of burning away material, why not do an additive process? I cut one piece that formed the bottom of the track segment and then the top segment was made of three pieces: the middle and then the two outer edges. The “rails” were left blank on that top piece. So the whole segment was two thicknesses high but the rails were only one thickness high. These were very quick to cut and it didn’t take too long to glue everything together. I thought for sure this would work but… the bottom of the train drags on the middle piece and the wheels can’t get to the bottom of the groove to push the train along. Fail. In the trash it goes.
If I spent enough time I could probably figure out the right way to do this, but this project has ceased to be fun and if I decide that I really want Elijah to have tracks, I’ll spend the $26 on Amazon so he can have tracks that actually work.
It wasn’t a complete bust because I learned a lot about the laser cutter and fine tuning designs, but it stinks that I don’t have anything physically complete to show for all that time.
Post It Holder
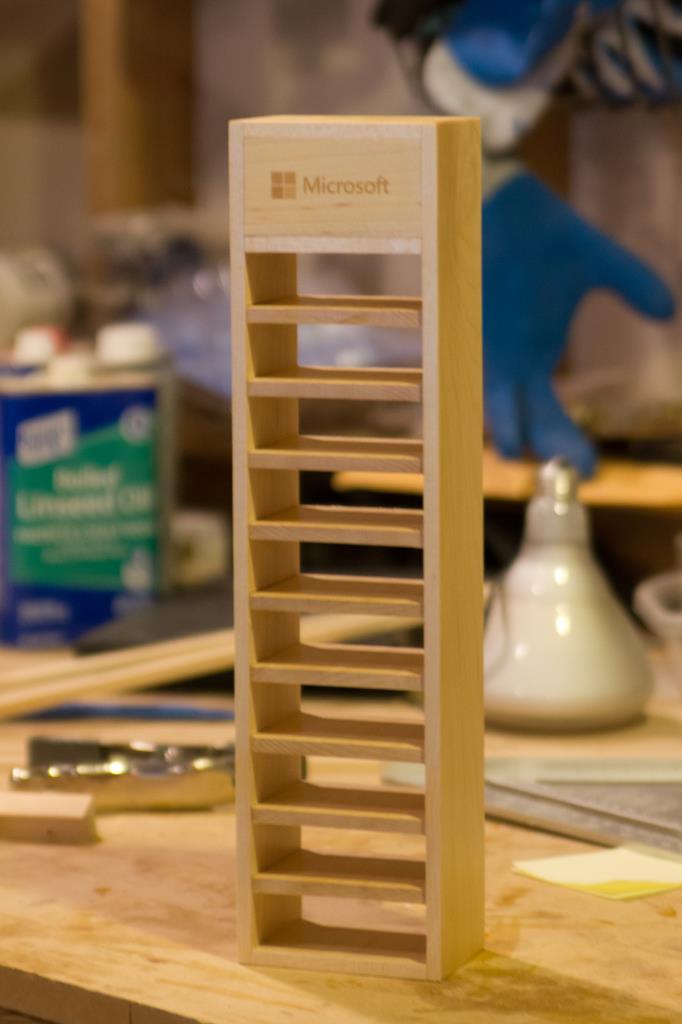
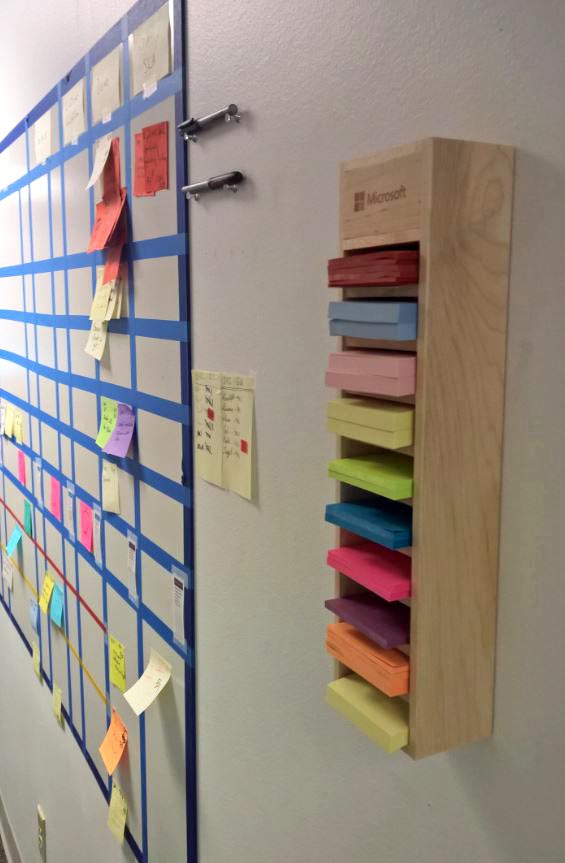
Our process for getting things done at work involves a lot of sticky notes. The person who has the office closest to the tracking board inevitably ends up with a huge pile of Post It Notes in their office. I decided it would be more handy to have them right on the wall next to the board so I grabbed a scrap piece of maple and set to work. I had a stack of post it notes on hand and kind of planned the design as I went. It’s held onto the wall with a French cleat and to hide that, I etched the Microsoft logo into some maple veneer.
WiFi Password
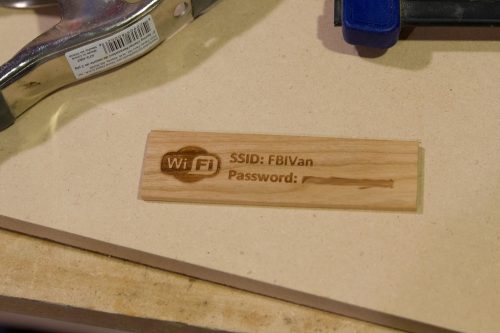
Now that we have a house with a dedicated guest room, I thought it would be nice to put a little sign in there that has the guest WiFi network and password. When I took my last trip to the laser cutter at work, I brought along a scrap piece of cherry and etched it right in. It’s a good reminder that projects don’t have to be complicated to be fun.
Adam Savage At Maker Faire
An estimated 160,000 people descended upon San Fancisco for Maker Faire this year. It’s a celebration of any kind of making you can imagine: woodworking, electronics, metal, jewelry, clothing, music, models and more (and all the various combinations of the various genres). There are many things I’m excited to do with Elijah when he’s a little older. Near the top of the list is a trip to Maker Faire.
There’s so much going on that I hear you can’t see it all in one weekend, but thankfully more and more of it is starting to appear online. One of the better videos that came out this year was Adam Savage’s one hour talk. The first part is read from notes and won’t win any awards for delivery, but the content is really good. It’s about the importance and value of making things. He then does a good Q&A session for the rest of the hour. He’s very passionate about creating ANYTHING and does a good job explaining why it’s such a great way to spend your time.
Toy Shelf
Many months ago, Tyla shared an idea to have some shelves in the family room to hold Elijah’s toys. It would not only be a place to store things, but also a place to rotate different toys on display to encourage Elijah to play on his own. I kept finding excuses to do other things but finally I decided to give it a go.
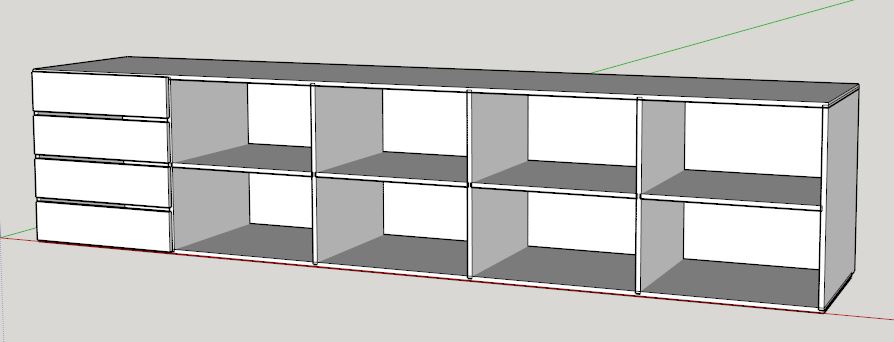
I started with a drawing in Sketchup to get an idea of the spacing and also make sure that Tyla was on board with the design. The whole structure ended up being 7 feet long. I’ve learned that big projects are a bit tough to deal with in the garage, but this was an easy one, right?
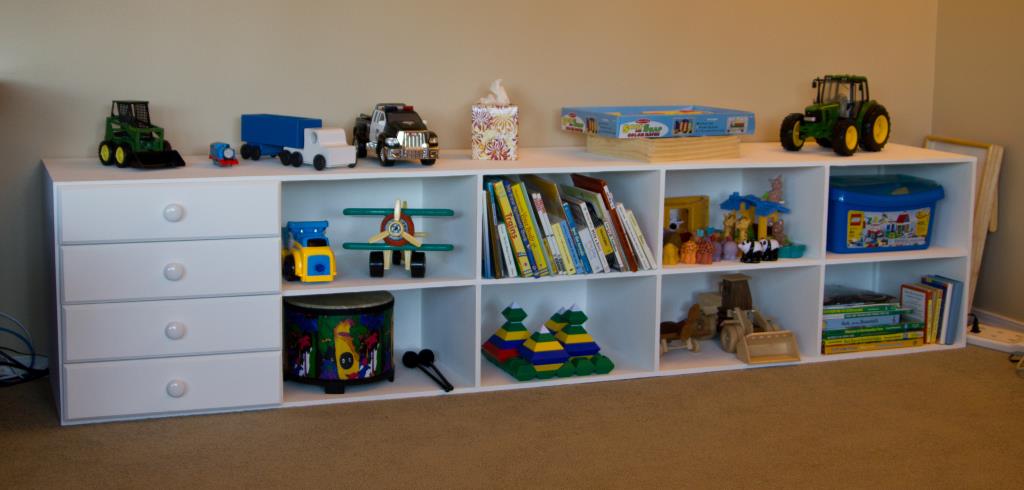
I ran into quite a few problems when building these. I did the initial glueup wrong and had to rip the nails out before the glue dried to start over. The edge banding didn’t stick nicely in all the areas. And I miscalculated and made the drawers 1/2″ too wide. But that’s part of the fun of woodworking. Nothing goes perfectly, at least in my workshop, and I’m presented with lots of opportunities to find interesting solutions. One of my favorite YouTube woodworkers is Steve Ramsey and when he has a major screwup, he makes the fix and says that it’s now “EXTRA FANCY!” These shelves are definitely extra fancy, but you know what? They work. Elijah is just going to beat them up anyway. I’m not building an heirloom. I’m building a toy shelf that we’ll throw in a bonfire after he’s older and we want something else there instead.
The bottom two drawers are only half as deep as the opening. Ever since we moved in, we’ve had a cardboard box covering up a bunch of ugly wires and a battery backup for the TV. I designed a void behind the drawers where I can hide all that stuff and there is also a space for a bunch of cables to run the length of the shelves back to the plugs. The top of the unit still fits snugly against the wall so all that is finally hidden.
Given the size of the project, I wanted to try spraying them. I even borrowed Don’s paint sprayer, but when I finally got around to spraying, the air was full of seeds and pollen. I ended up just taking the time to brush and roll it all, sanding between coats.
Now it’s on to the next project… it will definitely be something smaller!
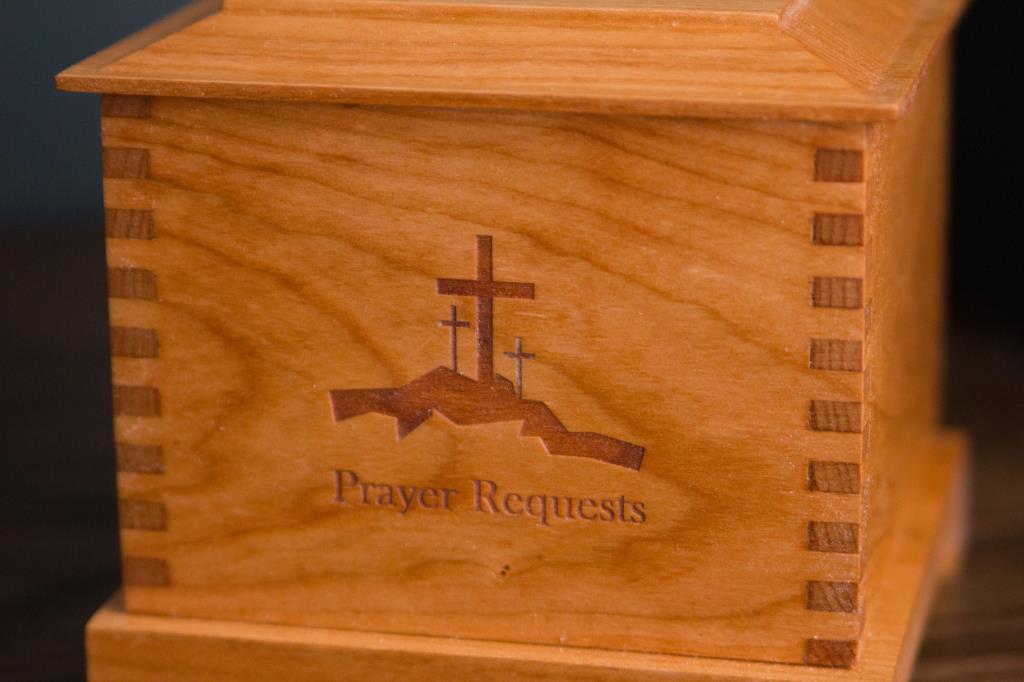
Prayer Box
Church asked if I’d be willing to make a “prayer box” for church. The idea is that people can write down prayer requests on pieces of paper, put them in the box, and then Pastor will remember them in his prayers. There were no design requirements so I chatted about some ideas, got a thumbs up and I was off and running to Crosscut Hardwoods to pick up a nice hunk of 5/4 cherry.
I wanted to play with my box joint jig again so I decided to do box joints. Unfortunately my first attempt failed because I didn’t clamp it well and the box wasn’t square when I was done. Instead of waste all that nice cherry wood, I sawed off the joints, cut some new box joints and then glued it together. So the box ended up smaller than I intended but I think it worked ok.
For the lid, I wanted to try a panel raising bit. I picked one up from Rockler and carefully cut the profile on the lid. It’s a huge router bit so it’s a little scary to use. I slowed the router way down and nibbled at the cut until it was the depth that I needed. I added a very thin layer of wood on the bottom of the lid that perfectly fits inside the box. So when you put the lid on, it is always centered and won’t slide off.
To make the box a little more special, I took it to the laser cutter and etched the church logo into the front of it. Dad was here when I did that so it was a good excuse to show him the laser cutter. Thankfully my testing was spot on and the logo ended up perfectly centered.
Instead of having people lift off the top to insert their cards, I wanted to put a slot in the top. But why just do a straight slot? I made it a cross. This was trickier than I had intended and I had trouble centering the cuts. Thankfully I had started with a very small slot so I switched to a wider slot and was able to cover up my mistake.
The final step was making a base for it. That was just a chunk of cherry and I used the router to remove the bottom half of the board except for the four feet on the corner.
For the finish I used an equal mixture of boiled linseed oil, mineral oil and wipe on poly. Four coats of that with a scrub from a synthetic pad in between coats completed the project.

Bandsaw Box
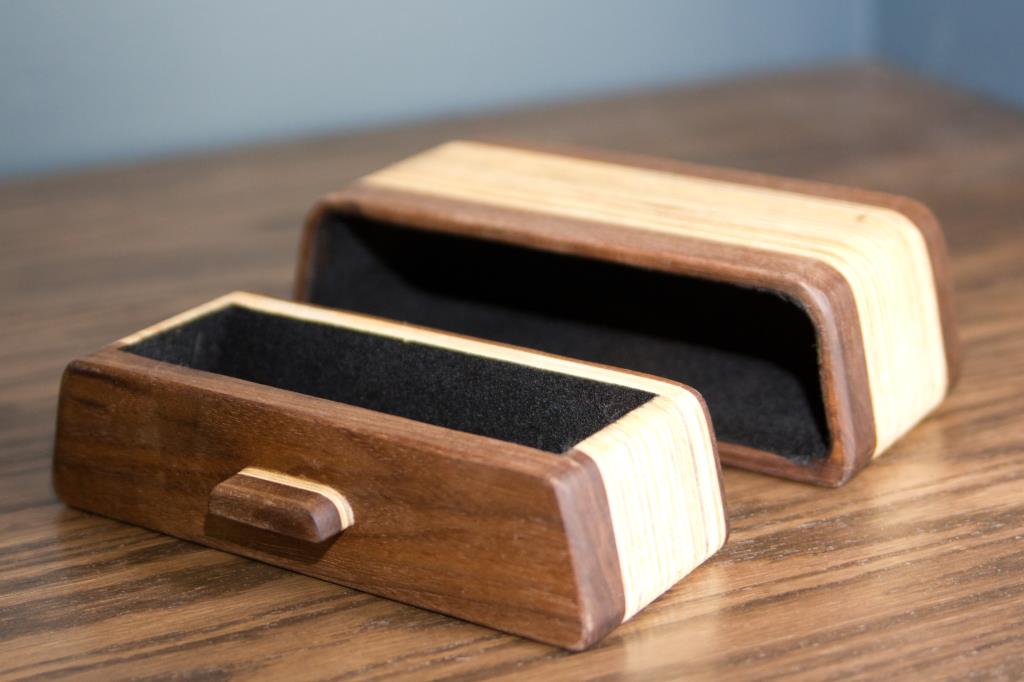
As soon as I unpacked my bandsaw last summer, I was eager to try some projects that really made use of it’s unique capabilities. While I’ve done quite a bit of resawing, I still wanted to try to make a bandsaw box. Bandsaw boxes are generally curvy and they have drawers that perfectly fit the shape of the curve. If you’re a woodworker, it makes you stop and think “Wait… how did they do that?”
I received David Picciuto’s bandsaw book for Christmas and dug in. There are a series of builds and I started off at the beginning. I learned a lot while making the box and I know my next one will be better, but I still thought this would make a good gift for Mom. The wood is a combination of walnut and plywood. The interior is covered with black flocking. Happy Birthday, Mom!

Custom Ammo Cans
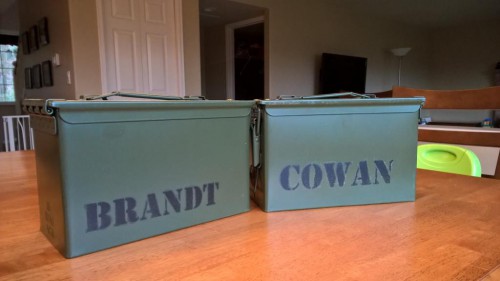
Making projects for birthdays is fun but it’s so hard for me to wait to share pictures of them! Ken’s birthday is today and Logan’s birthday was yesterday and they both got customized 50 cal ammo cans. The cans came straight from Amazon and then I used the laser cutter to cut stencils out of paper. I used spray adhesive to stick the paper to the cans while I covered them with rubber spray paint. The adhesive stayed on the can a little more than I had intended but they came out ok. I’m not sure if the spray paint will stay on the metal or if it will peel off too easily. If it does then we’ll just do it again but next time I’ll scuff up the metal first. The back side of the cans got a “serial number” involving their initials and birth dates.
Happy birthday guys!