Studio711.com – Ben Martens

Home Improvement

Generator

generatorWe lose power at our house once or twice a year. In the last nine years, there have been a couple multi-day outages, but in general, our power is pretty reliable. But… we bought a generator. When we came back from vacation to a house with no power, food going bad in the fridge and an overtired kid who was thrown even more out of his routine, I snapped and clicked BUY IT NOW on Amazon.

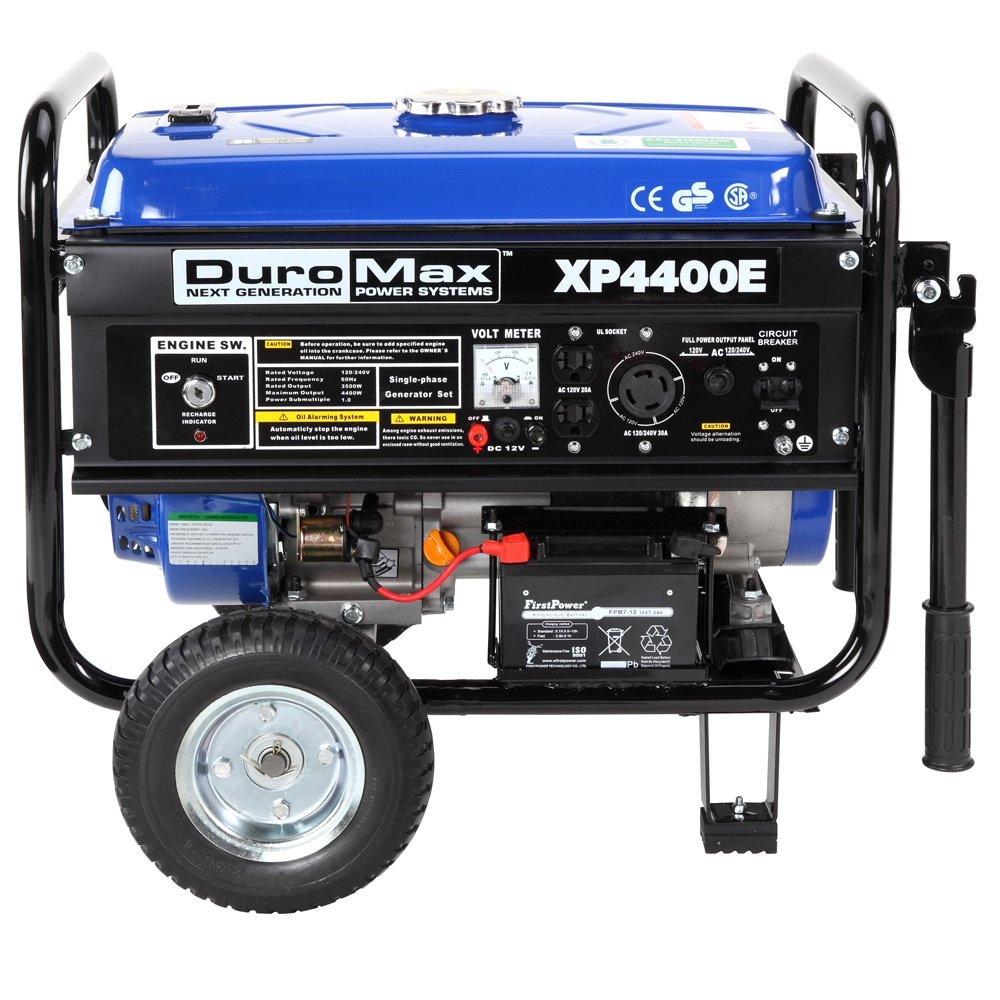
Generators can get really expensive. I think I kept it fairly simple by making some compromises. I didn’t get a name brand, I didn’t get a super quiet model, I got gas instead of diesel, and I didn’t get one that is wired into my house. What I DID get is a DuroMax XP440E. It’s rated for a sustained 3500 watts, has an electric starter and it cost less than $400. I figure that if we use it even a few times, I’ll feel like it was worth the money.

My main goal during an outage would be to run the fridge along with some lights and cell phone chargers. That will be easily accomplished by placing the generator on the back patio and running extension cords into the house. Simple, but effective.

At some point I want to have a bunch of upgrades done on my electrical panel (per circuit usage monitoring, whole-house surge protection, etc) and at that point I might have them wire in a transfer switch. Then I could just plug the generator right into the panel and (carefully) power the whole house. Obviously we wouldn’t fire up the dryer, the microwave, etc, but it would be really nice to use light switches. Plus, our water heater requires electricity because it’s tankless so this would give us hot water. Brent, our HVAC guy, said we could power our furnace with the generator too. So there are lots of possibilities but I don’t plan to go down that route soon (or maybe ever.) In an emergency, I’m pretty sure I could hack up a solution to get the furnace powered by the generator so I feel like I’m covered. Plus it rarely gets THAT cold here.

Once it arrived, setup was simple. There are a few steps to follow to get it ready to run the first time, but now it should start up very easily via either the electric starter or the pull cord. We live less than a mile from the gas station so assuming they have generators, we should be able to get gas from them as needed if my small local cache runs out.

That all being said, I feel somewhat ridiculous for buying a generator. I grew up in a house that seemed to lose power all the time and we never had a generator. This was definitely a luxury purchase, but for I’m happy with getting this backup plan for only $400.

OpenSprinkler With Power BI

I’ve been happily using OpenSprinkler to control my irrigation system this year. One of its many features is logging how long each zone is on, but I haven’t done much with those logs yet. Last weekend, I decided to dig in to the data.

The first thing I did was write a little app that runs every morning, checks the latest logs, and uploads the new data to a SQL database in Azure.

Then I stood out by the water meter and figured out how much water each zone used. That included the startup usage (since water drains out of some heads when the zone is off) and the usage per minute. That let me calculate how much water I’ve been using over the past few months.

I fired up Power Query for Excel and brought in all the data so I could get some nice Power View charts and graphs going. (Note that I could also have used the new Power BI Designer instead of Excel, Power Query and Power View.) I saved that workbook to OneDrive and imported it into PowerBI.com. I set up PowerBI.com to automatically refresh the workbook every morning and show me the charts on a dashboard.

It might sound complicated but it only took me about an hour of work and that included standing out by my water meter for 15 minutes. Now I can fire up the PowerBI.com website every day and analyze my water usage. Since this isn’t based on an actual water flow meter, it won’t help me find leaks, but it does help me get an idea of how much money I’m spending to keep my yard green. I’m also working on some new features that will keep track of the high and low temperatures each day along with the precipitation.

You can get a long way in Power BI before you need to pay for anything so go give it a shot if this sparks some ideas in your head.

pbiopensprinkler

Basketball Hoop

newbasketballhoopWhen we bought this house, there was a broken basketball hoop on the property back in the cul-de-sac. It seemed like a great location to play, but the hoop was unusable. When we tore up the yard, we took out the hoop and threw it away.

Once it was gone, I noticed that more people were driving through the yard there as they turned around in the cul-de-sac. I decided to put a new poll back in roughly the same place.

I bought a Lifetime 71525 hoop from Amazon (yay for free shipping with Prime) and it sat in my garage for about five months before I finally got around to installing it. That should have been a pretty straightforward process, but as soon as I started digging, I discovered that my brand new irrigation lines ran right through where I wanted the pole to go. That meant I had to dig the hole even bigger and make a detour in the pipe. After that, the concrete went pretty easy but it was tricky to keep the pole perfectly vertical while the cement set up. Assembly of the hoop was more complicated than I expected, but I finally got it worked out after a little modification to the lifting mechanism.

The hoop has been up for a couple weeks now and it works well. Elijah loves to have it lowered down to 7.5 feet so I can lift him up to dunk the ball. The cul-de-sac makes a nice playing surface except that the road slopes down to the curb a bit so shots that go through the hoop usually fall down to that part of the road and bounce back into the yard.

Hopefully this hoop provides us with years of fun! Or at the very least, it will hopefully cut down a little on people driving through the yard in that spot.

Don’s Fence

Last summer at this time I was in the middle of our huge yard remodel and that included building a fence. Don and Logan put in a lot of hours on the fence at my house. This summer, we’re all working together again but this time it’s at Don’s house.

So far we’ve gotten most of the old fence removed, most of the new posts in concrete, and some of the fence up. This past weekend we made a ton of progress because Don rented an auger and a cement mixer. We knocked out 10 posts before 3pm. Not too shabby for our ragtag group.

Somehow Don seems to end most of the work days with a bleeding cut on his arm, I hurt my back on Saturday running the auger and Logan broke his thumb by shooting a nail through it. You might not want to come help with this project. Our safety record isn’t very good!

donfence1 donfence2

Planter Box Drip Irrigation

dripirrigationplanterNow that we have our wonderful irrigation system controlled by the computer or my phone, I want to hook it up to everything that needs water! Thankfully, that turned out to be pretty simple. I got it connected to the three window boxes in front of the kitchen and all the way up to the hanging basket outside the front door.

Home Depot has a lot of the stuff I needed, but to avoid buying a lot more than I needed, I ordered from http://www.irrigationdirect.com/. I only found them through a web search, but they let me order very small quantities of very cheap parts (some were just $0.07 each).

Even if you don’t have an irrigation system, this is something you can set up yourself. Look for drip irrigation kits. You can find kits that connect to your hose bib. If you want to get extra fancy, you could use a hose timer, but my faucets are so leaky that these were never a great solution for me.

There is nothing complicated about it. You just need to figure out how all the parts go together. You would connect a hose to your hose bib, run it near your planter area, use the adapter to go to a 1/2″ tube and run that along the length of your planter area. Then you poke small holes in the tub and use connectors to connect in 1/4″ tubing. There are a lot of options on how to dispense the water from basic drips to sprays to tubing with emitters every 6 or 12 inches. You can customize exactly where you want the water and how much you want.

Theoretically this setup means I’ll use less water because I will only water exactly the areas that need it, but in reality, I’ve been using it a lot more because it’s so easy to turn it on. Once all my new landscaping and potted plants get established, I should be able to reduce the watering a bit.

Open Sprinkler Review

opensprinkler_v20s_5-500x500When Tim installed my irrigation system, he was kind enough to throw in a free irrigation clock that he had sitting around. It’s a standard Hunter model (probably $75-100) and it worked great, but every time I looked at it, I thought about how simple the device really was and that I should be able to control it from my computer. Standard industry offerings are hundreds or thousands of dollars with monthly fees. They’re mostly intended for commercial use.

After a little searching, I found opensprinkler.com. Somebody else had the same idea and made such a nice package that he is able to sell it. The basic model is Arduino based but there are Raspberry Pi and Beagle Bone versions too. I chose the standard model for $155.

Installation was a snap. I labeled all the wires from the existing clock and transferred them over to the Open Sprinkler unit. I also ran an Ethernet cord from the clock in the corner of my garage up into the network closet. (It is SO convenient having the network closet share a wall with the garage!) I turned the unit on and very quickly was turning the sprinklers on and off from my computer. With a little extra configuration I was able to do it from my phone.

Why? Well yes, it’s a toy, but it also makes it very easy to walk around the yard testing zones or turning them on to blow out the line. Also, last summer I’d wake up to hear the rain and realize that my irrigation was scheduled to run in the morning. To avoid wasting water, I had to turn off the house alarm, go out in the garage, turn the program off, come back in, turn the alarm back on, and go back to bed. Now I can just reach for my phone and adjust it… if I even need to (more on that below.)

Aside form the convenience factor, here are some other features that I love:

  • I can completely manage the system from the comfort of my couch instead of standing in the garage.
  • Programs can be set to start based on sunrise or sunset. General recommendations for lawn watering are to do it a little bit before the sun comes up to avoid the hot sun burning off the water but also not let give moss a wet, dark place to thrive. This setting makes that super easy.
  • By checking the weather online, the system can automatically adjust the programs based on the humidity, temperature and precipitation from the previous days. This either means skipping an entire program or just running it for fewer minutes.
  • Programs can be set to run every N days instead of on specific days of the week.
  • You can view a log of when each zone was on. This will be nice when I try to track water usage and also to evaluate how well the Open Sprinkler system is performing.
  • As the software gets updated and perfected, I can update my unit with the click of a button.

All in all, I highly recommend this product so far. As long as it actually does the job of controlling the irrigation system without ever crashing, I’ll be very happy!

Bark

Last weekend I spread seven cubic yards of bark around my house. Thanks to Logan for helping! It took a lot of wheelbarrow loads, but it looks great now. The bark lays nicely over the drip irrigation that I put in place (under Tim’s tutelage) to water each plant. It will help hold in the moisture from the drip irrigation, and, in conjunction with the pre-emergent I put down, it should keep weeds from growing. And oh yeah, it looks really nice too!

bark1 bark2 bark3

Plants

The final step in the back yard and front yard makeover was putting in new plants. We held off last year to spread out the bills and because I was more comfortable installing the new plants at the beginning of the growing season.

Picking plants for the entire yard would normally be a pretty daunting task, but it only took Tim a couple hours to figure out what would look good and walk me through it. He showed up with all the plants and we got them planted in less than three hours. Thank you (again) Tim!

The grass in the back yard heading down to the gate under the magnolia tree never had a chance. The constant wet weather in the winter left a steady stream of water flowing down an area that rarely got sun and it just turned to mud. I gave up on that and decided to bark it over as a walkway down to the gate. I also took the opportunity to make a planter along the fence out to the corner to add a little life to the back yard. You can see that new planter area in the last picture. We had planned ahead for this possibility and there was a drip line stubbed out in the corner.

This week I’ve been working on finishing off the drip irrigation lines and then this weekend I’ll be putting down six yards of bark over the top of all the planter areas. It will look nice and help slow down the weeds.

frontyardplants1 frontyardplants2 backyardplants

Guest Room Makeover

We have four bedrooms in this house so two of them were relatively unused. One was Tyla’s craft room/workout room and the other was the guest room. We decided to flip flop the rooms and while we were doing that, we might as well paint it. Those are two of the last rooms in the house that have original paint on them (one other is the formal dining room.)

Tyla did a bunch of research and came up with a color scheme. I did the grunt work of painting the room, painting the door (it was a weird off white color), and installing shelving in the closet. And then Tyla got the room all put together. Teamwork! We finished the project pretty quickly by working in the evenings after Elijah went to bed and it was done in time for my parents when they came to visit.

I’ll skip the before pictures since they basically just show white walls, no curtains, and no shelves. Here’s what it looks like now!

newguestroom1 newguestroom2

This project is done enough for now but we have lots more that we would like to do. The room could use a mirror and some wall hangings. I also want to build a nightstand, a dresser and maybe even a bed. This would be a good room for me to practice my woodworking skills since it’s not generally in use and we can get by with it the way it is now.

DIY Window Screens

buildascreenWe’ve never had a screen on the window in the master bathroom. At first it wasn’t a big issue since we never open that window, but when I have to seal the grout, it’s nice to be able to open the window. And with a big tree right outside, I always have visions of a squirrel or a bird making its way inside.

So I headed to Home Depot and bought the stuff to make a screen. Then I returned it and bought it again. Did you know that there are two different thicknesses for the screen frame? I didn’t, but now I do. As I was building the frame, it dawned on me that this is an easy home repair that some homeowners might not know how to do.

You can find plenty of YouTube videos to show you how it works, but here are the basic pieces. There is a metal frame that consists of four pieces cut squarely and held together with plastic corners. The plastic pieces slide tightly into the tubes and make a pretty strong joint. Some springs also slide onto the frame on one side. Then there is a groove that goes along the outside of the frame. Screen material is unrolled over the frame and then a thin piece of rubber gets jammed down into that groove and it stretches the screen material tight. Save yourself some grief and just buy the littler roller tool to help push the rubber into the groove. Finally you cut off the excess screen material and voila!

I redid every one of the screens in our house back in 2012 since the previous ones had all been torn up by cats. Now that I’ve built this one for the bathroom, I’m hopefully done for a while. It’s a handy skill to have in your bag of tricks though because it’s pretty easy for the screens to get damaged. Repairing them yourself is way cheaper than paying someone else to do it.