Studio711.com – Ben Martens

Gadgets

4k Video Editor Build

When we got our new Go Pro 8, I learned that my PC wasn’t new enough to play back the HEVC encoded video, much less do any editing with it. Sure, I could save the video in a different format, but I’ve been itching to upgrade my PC at home and this, combined with the 2.7K video that my drone records, was a good reason to go for it.

My requirements were that I wanted to be able to smoothly edit 4k video, view video in 4k resolution, and render edited videos as quickly as possible.

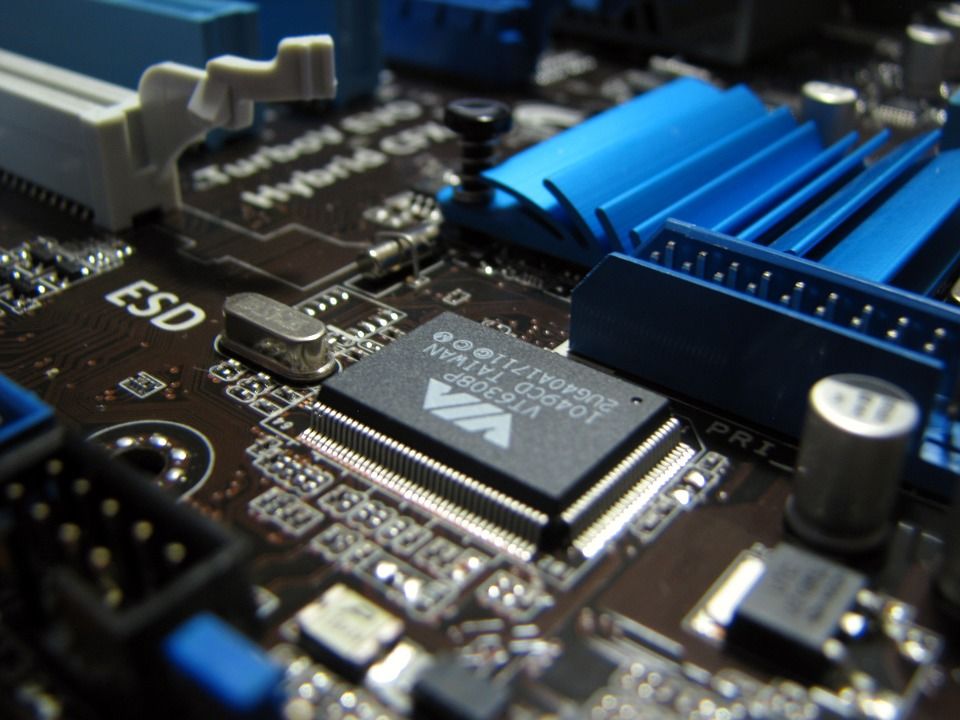
Every PC I’ve built or purchased before this point have been Intel CPUs, but lately, AMD has been kicking Intel around the block in terms of price to performance ratio. Just check out what the stock market thinks about the two companies over the last 5 years. The Ryzen 3770 seemed like a good price point for my build. It has 8 hyper threaded cores running at up to 4.4GHz. I built out a nice system around it with 32GB of DDR-3600 memory and an NVMe SSD. I’ve had no personal experience with that kind of SSD but wow, it’s FAST! Remember how much faster your computer was when you switched from a spinning hard drive to an SSD? This new drive is 10 times faster than the SSD in my last desktop. It reads data at a speed of 2.5 GB/second!

Here is the full parts list:

The build went pretty smoothly. The pcpartpicker.com website helped me avoid some incompatibilities. Once I got all the parts together, I flashed the BIOS, tweaked a few settings to get my RAM clocked up to the right speed and then installed Windows. Or rather, I tried to install Windows. It kept getting to about 60% of the way through and dying. As an “I don’t know what else to try” step, I rebuilt the installation media on the USB key and voila, it worked!

I capped it all off with a 4k monitor, the Asus MG28UQ. That felt like a splurge because my existing monitors were plenty good (though not 4k), but wow, once I got this all assembled, I ended up staring at YouTube demo videos and being amazed at the clarity. Plus it’s fun to see my drone footage in its full glory.

For a perf test, I fired up Handbrake on my old desktop and this new one, gave it a beefy video file from the drone and adjusted Handbrake with the same settings on each machine. This new machine got through it almost exactly 3 times faster than the old one. It’s not all roses though. I had a much nicer CPU cooler on the old machine and this new one is noticeably louder (but it has built in RGB leds… oooooo.)

It’s fun to have this new machine and it’s certainly going to make editing all those videos for church less painful. I’m also very excited to start watching things in 4k. I expect this will translate into a 4k TV before too long and then a 4k projector once my current one dies.

As a small reward for reading through all this nonsense (or at least scrolling to the bottom), here’s the first video I edited on the new machine. It’s all 2.7k footage from my Mavic Mini. Elijah and I went down to 60 Acres and took turns flying it around.

Seatback Phone Holder

I spent a few hours watching my phone on a recent flight before and ended up with a sore back from looking down at my phone for so long. That’s when I got the idea to make some kind of a phone holder hanger that would attach to the seatback tray table when it’s folded up.

But of course someone has already done it.

The good news is that there are a few different approaches to the scenario so you can pick your favorite. I used this Unitron World model on my flight to and from Israel and loved it. It worked quite well on all the flights I was on and it made it a lot easier to power through 34 hours of flights. They’re fairly inexpensive it’s not a huge deal if you want to try a couple different versions, but I really liked how solidly this one held my phone at any angle and how small it folded up.

Mavic Mini Review

Thanks to everyone who pitched in for my Christmas present this year: a Mavic Mini! Some of you may remember that I built my own quadcopter back in 2015 and while it worked well, I didn’t use it a ton and ended up selling it.

Fast forward to 202 and a few things have changed. Technology has improved dramatically and now you can fly 4k cameras around with high quality image stabilization with GPS signals feeding a bunch of automated flight algorithms. Also, I’ve given up on “quadcopter”. Fine. “Drone”. Whatever.

DJI makes a lot of very high end drones and the Mavic Mini is one of their entry level models. It was getting enough good reviews that I jumped in and went for it without doing a ton of research into the competing brands. Also, since this drone is only 249 grams, it’s on gram under the point where lots of additional FAA laws apply so you can skip some things like registering the drone.

I bought the “Fly More” kit which comes with some extra batteries, a carrying case, extra propellers and a few other things. I highly recommend it because while the batteries give you ~25-30 minutes of flight time, it’s pretty easy to burn through one before I’m ready to be done flying.

I saw a bunch of review videos online before I got mine, but actually witnessing it in person was still surprising. The video while it’s flying is rock solid. It’s like a tripod in the sky whether you’re hovering at 2 feet or 400 feet. (The drone will go up to 1600 ft by the FAA limits you to 400.)

There’s a remote that communicates with the drone but then my phone plugs in to give me a live view from the camera and adjust settings. Flying it is pretty simple as there are a lot of computers on board helping to hold you in the same spot when you let off the sticks and the gimble on the camera does a great job of removing vibrations or even large changes in direction.

I’m exited about the small size of the drone. I can easily fit the drone, batteries and remote into my hiking backpack so as long as I’m not violating any laws, I look forward to taking this on hikes. I should also be able to travel with it pretty easily so I can take it to Indiana and fly around home, fulfilling some childhood dreams of seeing my house from the sky.

The video from the camera is 2.7k at 40Mbps so the image is beautiful. It’s not a full 4k but it’s better than any monitor I own can display.

I put together a quick video from my first time flying it down at the school by our house. Prepare for gratuitous use of the drone in upcoming videos.

IFTTT

Home automation is a never ending rabbit hole. I love gadgets and it intrigues me, but I also try to make sure that anything I do is transparent to Tyla. I used to make use of a Samsung Smart Things hub. It was a nice way to bridge all the various home automation technologies like Zigbee, Z-wave and WiFi. It unceremoniously died a few months ago and I had never been thrilled enough with it to want to buy a new one. Most of my devices were WiFi anyway so I decided to go all in on that.

You need something to execute all the programs (e.g. When I get home, turn the thermostat back up and turn on the Christmas tree) and there are plenty of gadgets that live in your house, but I decided to try using IFTTT for everything. The acronym stands for “If This Than That.” It’s a really simple way to set up triggers and actions across hundreds of different services, the vast majority of which have nothing to do with home automation. I’ve used it a bit for years but I’ve never fully relied on it.

After a month of transferring my home automation actions to IFTTT I have to say I’m very impressed. It works really well and it’s super easy to adjust/tweak/configure as needed. So for now I say goodbye to custom in-house solutions and hello to more generic cloud offerings. Let’s see if I still feel the same way in a year.

Video Surveillance System

I’ve written quite a few posts over the years about the camera system I use around my house, but I thought I’d write up a new summary of everything that I recommend right now.

This stuff has kind of turned into a hobby for me, so the setup you’ll see later in this post is probably more than Joe Public is interested in. If you’re not looking to tinker a little bit, I recommend a package deal that includes the DVR along with a bunch of cameras. I bought one of the 8 camera Amcrest packages for church and we’ve been very happy with it. There are quite a few options ranging from 1080p up to 4k with varying numbers of cameras. You can see the full list on their site but there are a bunch of companies in this price range with similar packages. If even that is too much for you, companies like Simplisafe and your cable provider have camera packages but of course you’ll end up paying more for the convenience.

Ok, on to the more DIY solution that I have… all of the cameras I’ve ever owned have been from Amcrest. Are they best? Nope. But they work very well for me and they’re super cheap so I’m happy to replace them when they finally give up. I have one camera that is over 6 years old. I keep waiting for it to die because it’s only 640×480 resolution and I want to upgrade!

It’s possible to buy individual cameras and use the built-in web servers to access them remotely. I don’t recommend doing that. The security on those cameras is terrible and it’s very easy to accidentally (or obliviously) leave your camera open for easy access from the web. I kid you not, when I first was looking through the settings, I couldn’t believe the defaults. I did a quick internet search, typed in the default user name and password and bingo, I was watching a camera inside someone else’s house. Gross. The default settings have gotten better over the years but I still don’t trust them to keep up to date with every new exploit that happens.

To add a better layer of security I have a piece of software called Blue Iris running 24/7 on one of my machines at home. That software is then my entry point from the web or from my phone and that software has active development and updates. So none of my cameras are directly accessible from the web. Instead I fire up the Blue Iris website or app on my phone and then connect to my cameras.

The software also gives me a plethora of options (more than I’ll ever use) for doing things like triggering a recording and/or alert whenever motion is detected, recording the last N days of video, etc. I even played around with having it live stream one of my cameras to YouTube. The interface isn’t great but the feature you want is there somewhere. It might take a little while to set it up, but once you’re done, you won’t need to touch it much.

The other nice thing about having Blue Iris is that it supports a LOT of different cameras. So even though I have kind of standardized on Amcrest, I could easily buy one different brand tomorrow and throw it into the mix and I’d get the same standardized controls over the new camera too.

The final question is how do you want to connect your cameras to the Blue Iris software. The easiest is WiFi and generally that works pretty well. The catch is that you need to plug it into an outlet and if you’re doing outdoor installations, there might not be outlets handy. I’ve started moving to “Power over Ethernet”. To do this, you need a PoE switch that injects power down some of the unused wires in an Ethernet cable. As long as you get a PoE web cam, you can just run a single Ethernet cable to the camera and have a solid network connection and power all in one cable. That’s pretty convenient for those outdoor cameras.

How much does all this cost? Figure about $70-80/camera and then $70 for Blue Iris. There aren’t any ongoing monthly fees. That makes it pretty easy to dip your toe into the water with just one or two cameras to see how you like it. But they’re kind of like Pringles… once you pop you can’t stop! It’s easy to find reasons to add more and more cameras.

If you decide to go the Blue Iris route, I’m happy to help answer questions and guide you through the setup!

Mesh Networking

As I wrote back in 2016, our house is just big enough and the WiFi band is just crowded enough that we need two access points to get good coverage. Back then I chose to dive into Ubiquiti networking gear. You can kind of think of their stuff as consumer grade equipment with enterprise an level feature set (and learning curve!) I installed some of their stuff at church with great success and it worked ok around here, but I was having to reset it more and more frequently. Plus the router we had was also flaking out periodically. It was either time to beef up my Ubiquiti game or go a simpler route. For once in my life, I chose the easier, less geeky route.

Mesh networking is the hot new(ish) trend. Multiple devices are spread around your house and they work together to service all your wireless clients. They automatically hand clients off to the access point with the best signal. Some of the more popular brands are Orbi, Eero and Google WiFi. I chose… none of those. Instead I went for Synology’s offering largely because a group of people at work were singing their praises and it looked a bit more configurable and was cheaper to expand as needed.

For my main router, I chose the Synology RT2600ac and for the extra access point downstairs, I got a Synology MR2200ac.I think I could have saved a little money by just getting two MR2200’s but I opted for the beefier RT2600ac because I have a lot of wireless and wired clients in my house and I figured the extra horsepower wouldn’t hurt.

The system was pretty simple to configure (though not as straightforward as products like Orbi) and I have been happily roaming around my house for a few weeks without ever dropping my signal. I have great coverage everywhere inside, out in the driveway (useful for checking traffic while I’m sitting in the truck) and out in the cul-de-sac. Oddly the only place I’m having trouble is on the back patio. I’m not sure what the deal is there but I’ll have to either place with the placement of my devices or add a third access point to completely blanket my property.

The interface for the RT2600ac is very impressive. It’s basically a full windowed desktop environment inside your browser. You can enable plugins, get traffic reports emailed to you, and toggle feature switches to your heart’s content.

If your existing wireless setup is working well for you, don’t bother changing it, but if you’re in the market for a new system, this Synology gear gets the thumbs up from me so far.

Cell Phone History

We’ve had our Galaxy S7 phones for over 2.5 years now and they’re holding up amazingly well. I do notice deteriorating battery life, but the wireless charging makes it pretty easy to keep up with that. The features and performance are holding up much better than any cell phone I’ve had before. It’s still tempting to get something newer, but with the top tier of cell phones weighing in at around $1000, I think we’ll have these for a while longer (and I’m also getting more intrigued by the mid-tier phones that have very impressive specs.) Plus, now that Verizon finally has separated the price of the phone from the price of the plan, it makes more sense to hold onto a device for longer.

It got me thinking about the various cell phones that I’ve had over the years. I did a little research and was able to find models and dates for almost everything. Here’s the list:

Sanyo SCP-4000 (?)
May 2001
LG 4500
April 2004
Motorola Q
September 2006
HTC Touch
May 2008
HTC Touch Pro 2
January 2010
HTC Trophy
June 2011
HTC 8x
December 2012
Nokia Lumia Icon
January 2015
Samsung Galaxy S7
October 2016

Computer Upgrades

It dawned on me recently that my main home desktop is coming up on seven years old. SEVEN YEARS. I used to be happy if I got four years out of a computer and here I am at 7 years and I can’t come up with any reason why I’d need to upgrade. I took a look at CPU benchmarks and stuff in my price range would only be a ~30% increase of what I have now. Increases in RAM speed and major increases in SSD technology would definitely give me an improvement but I can’t say that I’d notice it much with my use case. I love getting new computer gear, but I think it’s going to be a while before that happens again.

This seems like a good excuse to update my computer ownership history though. The ones in italics are still in use.

  • 1998 – Gateway Pentium 2 350 with a 10GB hard drive and a tape backup.
  • 2002 – Dell P4 2.4GHz with 512MB RAM and an 80GB hard drive. $900
  • 2006 – Dell Core 2 Duo E6600 2.4GHz with 2GB RAM and a 250GB hard drive. $1200
  • 2010 – Core i7 860 2.8GHz quad core with 8 GB RAM. $1000 (Replaced motherboard and CPU ins 2014 for $260)
  • 2011 – Lenovo Thinkpad Edge $700
  • 2012 – Core i7 3770 3.4GHz quad core with 16GB RAM. $1400.
  • 2013 – HP Pavilion Touchsmart 15-b154nr AMD A8-4555M quad core 1.6GHZ and 6 GB of RAM. $550
  • 2015 – Dell XPS 13. $800
  • 2016 – Intel Core i3-6100 CPU with 8GB RAM. $360

I suspect that the next thing we’ll replace is the laptop only because that gets more abuse than the desktop machines. I’ve been very happy with the XPS 13 though. It has held up much longer than our previous laptops and isn’t showing any signs of impending doom.

Cord Cutting the Super Bowl

We canceled cable last summer and for the most part, our antenna has filled our needs. We get great reception on FOX, but not great on NBC. CBS and ABC are somewhere in the middle. Since we host a party every year, reception of the game is kind of important.

CBS had been working fine in the days leading up to the game so I wasn’t too concerned, but then it started snowing (for the first time this year) a couple hours before the game. Since we’re kind of on the fringe with our reception, the snow was just enough to start messing with the signal a little more. If it was just me, I wouldn’t have worried about it, but it’s not fun having 20 people watching a glitchy signal.

Thankfully CBS was streaming the game for free and they even supported Chromecast so I used that on the projector. Our experience there was generally good but it probably buffered 10 times and once I had to restart the stream completely. Downstairs I needed it on the Roku so I signed up for a free trial of CBS All Access. (I used a privacy.com temporary credit card number so that I don’t have to worry about forgetting to cancel my subscription!) I didn’t watch that TV but the people downstairs didn’t ever see it buffer and didn’t realize that it wasn’t a “normal” TV feed.

So it was definitely not as easy as traditional cable, but it was pretty good. I think next time I’d use my Xbox to stream the game through a paid service (like CBS All Access) instead of using the free stream from the website and I suspect that would have gotten rid of the few problems that we did have.

Hi Alexa

We’ve had an Amazon Echo in our house for a couple months now. I’ve resisted these types of devices for a long time because of the privacy implications. What changed? Basically I gave up. Privacy feels like a hopeless game because I’m not willing to live the hermit life required to have a chance at privacy. And aside from the “the sky is falling” reasons, maybe I trust these bigger companies a bit because if they’re going to put so much of their business into a product, imagine what would happen if there was a big privacy snafu. That’s probably naive.

My bar for electronics is “If it broke, how much would I want to replace it?” So far the Echo is pretty low on that list. I probably wouldn’t replace it, but I don’t mind having it around. The two main reasons I got it were to be a source of entertainment for Elijah and to play music from our Spotify account.

Elijah does enjoy it quite a bit. There’s an app called Amazon Story Time that reads free ~5 minute stories to him. He loves audio books and he gobbles up these stories. That’s a big hit.

The Spotify integration, on the other hand, is disappointing. While I can easily tell it to play one of the playlists on our account, the fatal flaw is that the Spotify Connect protocol only grabs the first 100 songs from the playlist. We have some very nice (long) playlists that blow past the 100 song limit. 100 song sounds like a lot until you listen to it for a few days. Fail. I blame Spotify more than Amazon for that one, but the end result is the same. The workaround is connecting to the Echo via Bluetooth and playing from my phone but that’s not nearly as convenient and I have other devices that can do that.

Spottily was giving away free Google Home Minis to members with a family plan account so I snagged one of those too. It has been sitting in a box for a few weeks. I haven’t even unpacked it. I’ll probably do that at some point but I figure my results are going to be similar but with a lower quality speaker.

For our use case, the Echo feels more like a party trick than a useful home appliance. I’d rate it a solid “Meh”.