Studio711.com – Ben Martens

Search Results

18-Month Drone Timelapse

Ever since we moved here about 12 years ago, there has been a big open field behind our neighborhood. It provided a nice buffer as we looked out our back windows. As expected, the person who owned that eventually passed away and it was sold to a land developer. Over the course of about a year and a half, they tore out everything on the property, dug an enormous hole for a water retention box, and then put six house on top. The houses are selling for $1.8-2 million. Real estate around here is nuts.

I had gotten my drone earlier that year so I started capturing some photos and videos of the project. Then it occurred to me that if I could somehow fly the same pattern repeatedly, I could build a video drone timelapse! Thankfully there are plenty of apps like this already available and with very little effort, I had Dronelink up and running. I was a bit limited in the paths that I could run smoothly due to the speed of my old phone, but I got a basic one programmed in and started flying it every weekend. Over the course of the project, I added a couple more routes into the mix.

After 18 months of flying most weekends and then many hours of editing trying to align all the images and video, here’s the result:

Once you start a project like this, there really aren’t a lot of adjustments that can be made. You need to keep doing the same thing to get the timelapse and a lot of the learnings aren’t visible until you do all the editing at the end. If I had it to do over again, here are some things I’d do differently:

  1. Always fly in exactly the same lighting conditions. The cloudy days were the easiest to edit. Direct sunshine make it really difficult, but theoretically if ALL the shots were direct sunshine around the same time of day then it might be ok.
  2. Take the time to calibrate the gimbal and wait for extensive GPS lock before starting. Some of the shots were way out of the norm and it took a lot of time to try and twist the results into something that matched the shots around it.
  3. When editing, pick a clip in the middle and then work out toward both ends to align all the photos. Otherwise the error increases over the whole span of the video and by the end you have a huge area of black. I had to redo a couple sections because of this mistake and because I didn’t learn my lesson the first time.
  4. Pick paths that are far away from the action. Ideally they would have the full project in view for the whole flight. I wish I had just done a big circle around the project or something like that.
  5. As cool as the video idea is, I think the photo part of the timelapse worked the best. Doing a mix of the two is probably good because I still think the video could be done well, but it’s a higher degree of difficulty.

Hopefully I’ll never be in a situation where I’m think close to a major building project again so I’m glad I took advantage of the opportunity. That being said, I’m glad it’s over because it did get a bit boring as time went on.

Cape Disappointment Drive Timelapse

I enjoy making timelapses when we go on road trips. I rarely watch the whole thing straight through, but sometimes there are interesting spots that are fun to revisit. Plus, it’s a fun little project to have going along the trip.

I made a timelapse of our trip from Woodinville to Cape Disappointment State Park in the southwest corner of the state for our most recent camping trip. The video has the trip down immediately followed by the trip back (6:36 is when we are at the campground.) On the trip down there, notice the incredibly bad traffic. It added 2 hours to the 3.5 hour drive. On the way back we only hit one bad spot but it was really bad and even the backroads were jammed. It added 30 minutes.

We are planning a drive out to Montana soon to visit some of Tyla’s family. I’m working on some modifications to my setup to make it easier to do those super long timelapses.

Long Timelapse Tips

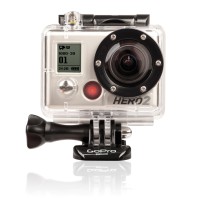
GoPro-HD-Hero-2During our Indiana trip, I made a six-day timelapse. That was by far the longest one I’ve ever attempted. How did it work? Here are some tips:

  • The GoPro is a great device for this. You can set it to snap a photo every 2, 5 or 10 seconds. Generally I do 2 seconds but since this one was so long I did 5 seconds since I knew I would speed it up a lot anyway.
  • Set the GoPro to the lowest resolution possible. On my camera that is 5 megapixels. Even that is a waste since you’re going to end up resizing down to 1080p anyway. The lower resolution will help you save room on the memory card and also saves battery life.
  • Don’t skimp on the memory card. 32 and 64GB cards are super cheap. Just get a big one and remove this potential problem from your setup.
  • Get a portable USB battery pack. I use this one, but there are lots of options. Get one that takes AA batteries. When you run out of battery, you just slap new batteries in there and you’re instantly ready to go instead of waiting for a recharge. I use and recommend Eneloop AA’s and the Lacrosse BC-700 charger. By using the battery pack to keep the internal GoPro battery charged up, I’m able to confidently let the camera run for 4 hours and it will probably go a lot longer. I changed out the batteries at lunch and at night. That way I didn’t have to worry about them dying on me.

When I was done I had over 30,000 photos. How do you process all of those into a movie? There are LOTS of options, but here’s how I do it (for free):

  • Install IrfanView. It has a lot of features, but I use it to batch resize and crop all of the photos down to 1920×1080. I also rename the photos to something like image#####.jpg so that there is a sequential number for every image.
  • Install ffmpeg. Decipher the command line parameters to build up the video that you want. Here’s the line that I use:”c:\program files\ffmpeg\bin\ffmpeg” -i image%05d.JPG -r 30 -s hd1080 -vcodec libx264 -y out.mp4
  • Techincally you could be done at this point, but I usually take that MP4 into Adobe Premiere Elements and crop it up, speed it up, slow it down, etc.

Christmas Timelapses

I took the GoPro along on our trip to Indiana and made a few timelapses. I thought they would be good for the video that I put together, but they ended up getting cut. They are still kind of fun to watch though so I uploaded them to YouTube. There’s a video of Dad, Mom, Luke and David walking back up the driveway toward the house, a video looking out the window from O’Hare (gate C17 I think?) and a long video of us unwrapping Christmas gifts.

Painting Timelapse

Last weekend, we put a coat of white, reflective paint on the flat roofs on the church property. I set up a GoPro in the corner of the roof on a tripod because I can’t even do manual labor without geeking it up.

By the way, if you want to see more stuff like this and photos from the work days that I organize at church, you can friend the church on Facebook. In addition to doing the property maintenance, I’m also the self-appointed social networking guy so I’d love to see our numbers go up!

Pregnancy Timelapse

Somehow during Tyla’s pregnancy we remembered to take a photo of her belly every week. I finally found some time to put it together into a video. Enjoy!

Potholes Timelapse Video

Yesterday I posted a timelapse video where the main feature was the GPS points on the topo map. When we drove back from Potholes a few weeks ago, I focused more on the images. I taped a USB webcam to the rear view mirror and had it connected to the laptop which was running an app to capture an image every two seconds. That worked great except that there was a problem with the inverter and the laptop battery died before we even made it back over the pass.

I took the images that we were able to snag, combined them with the GPS data and created another timelapse video. It’s all done with a custom C# program so if you geeks out there have any questions, let me know. Basically it’s a WinForms app with a web browser that loads the Bing maps and then I use Win32API calls to capture an image of the app. I have another app that combines all the image files into a WMV file.

The next thing I want to try is using the little HD video camera to record the images/video and see how that works. I have a suction cup camera mount that should make it easier to mount in the car and using the video camera means that I won’t need to have the laptop running. I plan to give it another try when we drive out to the coast in a couple weeks.

The video is embedded below, but again, it works best when you view in full screen HD quality. The GPS wasn’t able to get a lock on the signal for a while so it starts out with just images and then the location data kicks in. I wasn’t intentionally trying to keep our camping spot a secret since you could just watch the images and figure out where we were.

Camp Muir Timelapse Video

I’ve been playing around with a lot of time lapse ideas lately. I took some pictures for part of the return trip from Potholes which you’ll see soon, but on the hike up to Muir, I distracted myself by thinking how I could combine all the various data I had collected into one display.

In the backpack, the GPS was taking a recording every few seconds. I was also snapping photos every once in a while. To combine the two, I wrote an app to plot out our current location on top of a topo map and show a photo that was taken at that time (if one exists.) With the GPS data, I was also able to show our rate of ascent, the current elevation, the current time, and the latitude and longitude.

I combined that all into one application, wrote each update out to a new image file and then combined the image files into a movie file. It’s embedded below or you can find it on YouTube. It’s best when viewed in HD in full screen mode.

2023 Year In Review

Didn’t I just write one of these? Do I really have a years worth of events to summarize? Let’s see what that looks like…

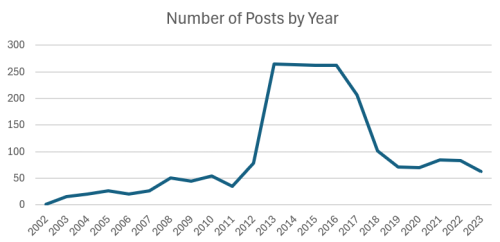
I felt like I had a lot fewer blog posts this year , and while it was down about 20% from the previous years, it wasn’t that far off the numbers I’ve done since coming off my “post every week day” routine. I think the difference I’m feeling is that a lot of my posts this year were on a single topic (Tesla.) I have no plans to change anything about my posting schedule here. I’ll continue to post when I have something that I think is worth sharing/documenting and I’m not going to worry much about gaps between posts.

The first thing that comes to mind for 2023 is all the driving we did. Our big family vacation was a ~2000 miles road trip to and from Moab. That trip exceeded my expectations. The scenery felt like the complete opposite of what we get around here, the weather was great, the hike planning worked out perfectly, and the excursions were a blast. So many things could have gone wrong and changed our plans but the whole trip “just worked.” I came back itching to get on the road and do something like that again… which was good because we got the chance again quickly when Tyla’s grandma passed away. We made another ~2000 mile round trip drive to Glasgow, MT. God kept us safe again over all those remote roads and we enjoyed our quick weekend with Tyla’s extended family.

Those two big trips weren’t the extent of our travel though. We also spent a week visiting my family in Indiana, drove to Canada, and went to an airshow at Joint Base Lewis-McChord. We had two camping trips, Lincoln Rock and Grayland Beach, but neither one of them involved our tent. We stayed in a cabin and a yurt which were both an enjoyable way to camp. Next year we’ll be getting the tent out again though. We also did a couple family hikes to Cedar Butte and Sheep Lake.

Usually all of our vacations are taken as a family, but this year I took one by myself to attend the PacNW Christian Men’s Retreat across the sound at Fort Flagler State Park. Men from all our affiliated church’s in the area get together to study, socialize, and relax. The speaker this year was Professor/Doctor/Pastor Mark Paustian and he was a joy to learn from. The whole experience was so good that I’m already signed up for next year’s event.

My list of projects is quite a bit shorter this year, but some of that is because I worked on some bigger/longer projects. There was the custom LED panel, the completion of an 18-month aerial timelapse, a segmented cherry bowl made on the CNC, a walnut wall clock, Halloween boxes, bandsaw deer, and a family sign.

Other than woodworking, my hobby time was mostly consumed with more disc golf, a surprising amount of 3d printing, and a LOT of piano playing. I have been playing more often for church services, and it takes me a long time to practice. I do feel like playing for services has gotten easier as I’ve gotten back into the groove of doing it regularly.

Church was very busy this year too. We now have a fully documented mission statement along with core priorities and goals. It has been great to see people rallying around our defined strategy and contributing to our shared efforts of spreading the good news of Jesus to our community. God has blessed us with a huge number of visitors walking through the door. I’m excited for even more improvements in the coming year as we work on a new constituion and new bylaws. Those new documents will streamline our organizational structure and help get even more people involved.

So that wraps up the “clip show” of my year. I’m very thankful for all the blessings we’ve been given and the relative easiness of this past year. Let’s see what 2024 will bring!

Previous Year In Review Posts: 20032004200520062007200820092010201120122013, 20142015201620172018201920202021, 2022

Dronelink

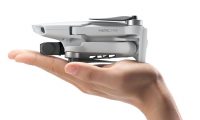
One reason DJI sells the Mavic Mini for less than its other drones is that it doesn’t have as many autonomous features. However, they recently published an SDK do a number of 3rd party companies have added the Mavic Mini to the list of drones that can be controlled by their existing software. I ended up paying $20 for a hobbyist license to Dronelink. The price was low enough that it seemed like it was worth a try.

The main customer of the software seems to be companies who need to get aerial photos of buildings, bridges, etc but they don’t have a stable full of expert drone pilots who can quickly get the shot perfectly every time. With the software, the route planning can be done completely from a website and then executed via a phone app connected to the controller. You can also create simpler programs out in the field directly from the phone.

My old S7 was woefully underpowered and while it would run the software, the drone had barely taken off before it complained about the lag and refused to continue. My new Pixel 4a does a much better job but for a complex curving route where the gimble is constantly adjusting to keep pointed at a specific object, there are noticeable glitches. For simple routes, it seems to do a good job.

Here’s an example of a “trucking shot”. Imagine someone driving along in a truck with a camera pointed out the side. I didn’t make a perfectly straight path so you can see some points where it turns but overall, there isn’t stuttering to the movement.

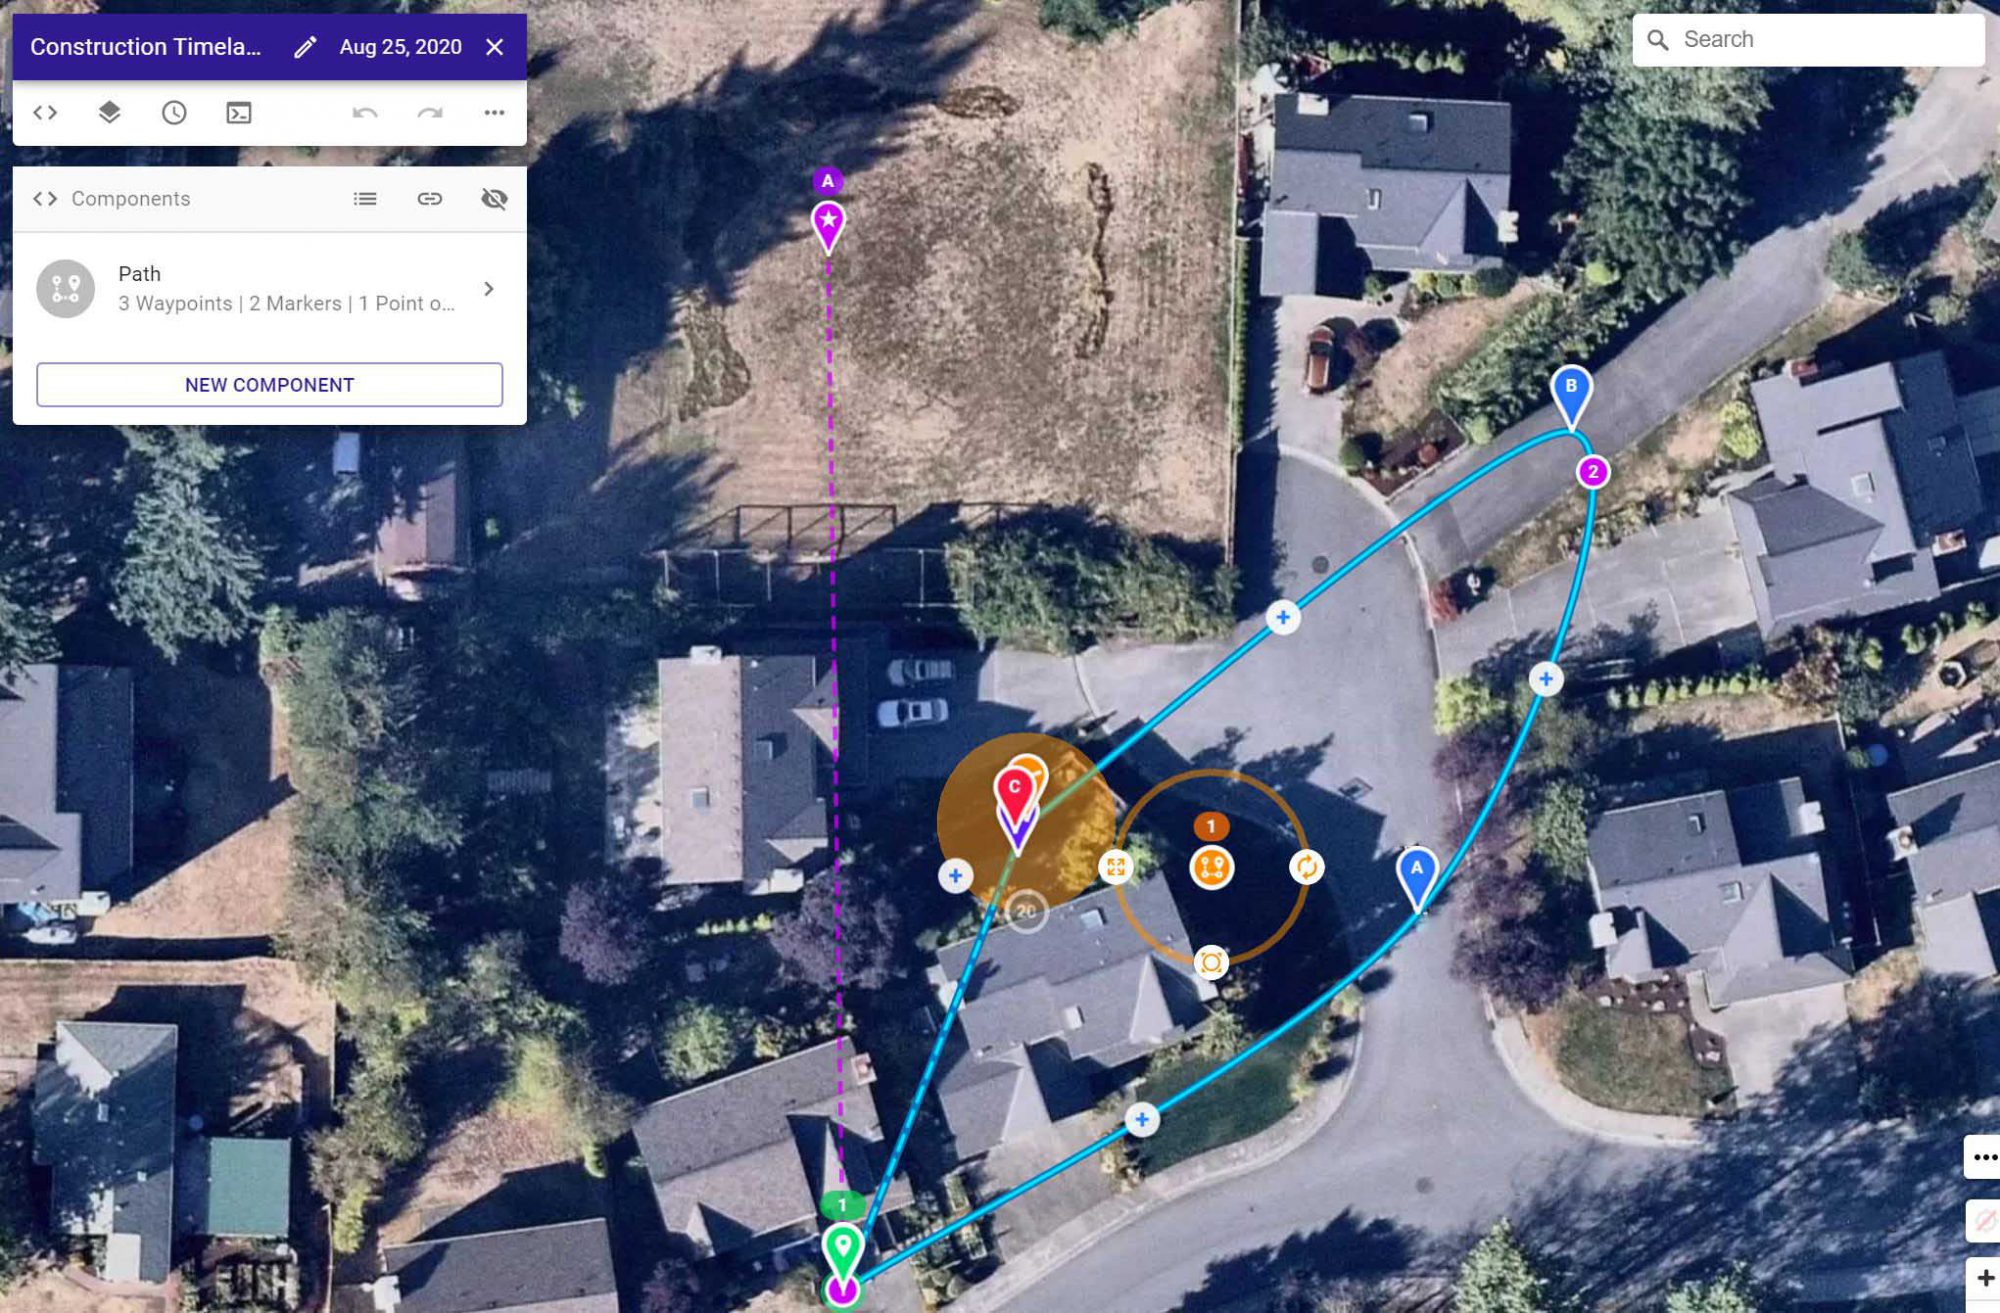
Now here’s an image of a more complicated route followed by the video that resulted.

You can see the stuttering as my phone tries to chug through all the commands in real-time. I suspect that if I had one of the flagship phones, that stuttering would go away.

For $20, I’m still happy with this purchase. I want to try to plan out a route that is simple enough to capture smoothly and then run it every week or so and try to stitch it together into a timelapse after the construction is complete. I’m guessing I won’t be successful but I suspect I’ll learn a lot in the process.